Katie Stew

A rich, simmering blend of my favorite things

December 2, 2011
by katie
125 Comments

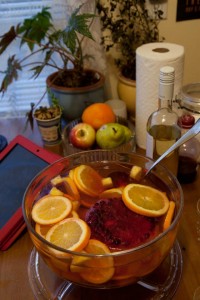
Thanksgiving Part 2- Sparkling Pomegranate Punch

I find that one of the best ways to provide drinks for a party is with a good punch. A punch allows you to provide something beautiful and fabulous for your guests to drink that you can make ahead of time and forget about. (Which is especially handy if you are drinking the punch as well.)

This year I came across this Sparkling Pomegranate Punch recipe on a Food and Wine holiday drink slide show. I was drawn to the great colors in the picture and the simplicity of the recipe. Mostly champagne? I’m down.

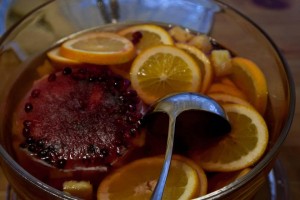
Now, I wasn’t interested in providing ice for individual glasses and doing fancy garnishes. That sounded hard. So instead, I made an ice mold to float in the punch bowl to keep everything cold and also floated all the fruit. It worked really well. The night before, I filled a glass container with some fruit, enough pomegranate juice to create a nice color, and the rest with water. I froze it overnight and ran hot water over the bottom of the glass when I was ready to make the punch, and the ice popped right out and into my punch bowl. Then you just add in the rest of the stuff and you don’t have to think about drinks for a few hours!

The color combination makes for a beautiful presentation and a very tasty punch. Try this out for your upcoming holiday parties! Though honestly, this is one that would really work year round.

Sparkling Pomegranate Punch
From Food and Wine

3 tablespoons sugar
1 cup pomegranate juice
Two 750-milliliter bottles sparkling wine, chilled
3/4 cup late-harvest white wine, such as late-harvest Riesling, chilled
2 oranges, thinly sliced crosswise
1 cup diced fresh pineapple (1/2 inch)
1/4 cup pomegranate seeds
Ice cubes, for serving

1. In a punch bowl, dissolve the sugar in the pomegranate juice, stirring vigorously. Add the sparkling wine and late-harvest white wine, then add the orange slices, diced pineapple and pomegranate seeds. Serve the sparkling pomegranate punch over ice cubes, or create an ice mold the day before to float in the bowl.

December 1, 2011
by katie
1,132 Comments

Thanksgiving Part 1- Collard Cobbler

Hello friends!

Happy Thanksgiving.

I had an absolutely fabulous Thanksgiving this year, or 3 Thanksgivings I should say. I first shared in a Thanksgiving feast at my office, potluck style. Then I spent the actual day with friends in Olympia who cooked a wonderful meal and then on Saturday I co-hosted a friends’ Thanksgiving where we made most of the main dishes and people brought things as well. Each one was awesome, but I definitely did the most cooking for Saturday.
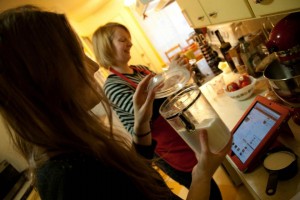
That's me cooking away in my favorite apron. The other lady with me helped cook all afternoon and took many of these lovely photos.
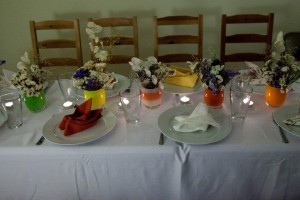
This is the beautiful table created by CB for dinner.

Let me tell you a little bit about the meal. There was: Fried turkey, ham, mac and cheese, dressing, procuitto wrapped green beans, collard green cobbler, mashed potatoes with truffle oil, turkey gravy, cranberry sauce, ham sauce, rosemary rolls, and then dessert, which consisted of apple pie, cinnimon pull aparts, and pumpkin cheesecake.
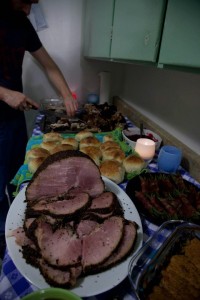
Feast!

Whew! I feel stuffed just listing all that out!
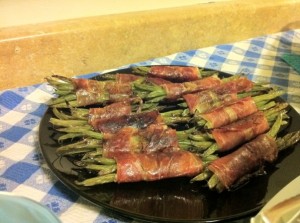
Procuitto wrapped, balsamic roasted, green beans

I made a whopping 10 different recipes that day, which in retrospect was too many. But, everything was amazing. I mean really amazing. No one had favorites because everything was so consistantly awesome. I’d say to myself, this collard cobbler is great. It is my favorite. But then I’d have some stuffing with gravy and change my mind. But then the mac and cheese was so good. You see my problem?
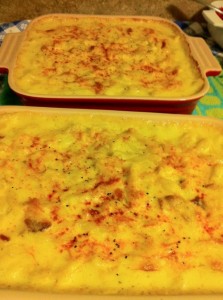
Yum. Mac and Cheese. One of my favorite of the potluck items.

So, I’m going to share a number of the recipes that I made over the next few days. All of these are serious keepers that I look forward to making again. I’m still eating leftovers and am very happy about that.

First up, Collard Cobbler. This was the first recipe I saw that I knew I had to make for Thanksgiving. I was really excited about it and it did not disappoint at all. In fact, it was truly delicious. Collard greens are a new thing for me and I have fallen in love. I only made one change to the recipe, which was to add a chopped jalepeno to the onion cooking step. Because really, why not? I’d really recommend it. Oh, and I might have added more sausage than it called for because well, 4 oz is a sad little amount.

The only advice I have is that the cornbread did not lend itself to kneading and cutting before the fridge. Mine was way too sticky. Maybe I should have added more flour, but I just went with it. I flattened it into a big square with my fingers on a cookie sheet and once it was cold, I then cut it into the squares for the cobbler. Worked just fine.
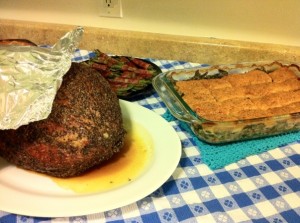
Collard Cobbler next to the ham

Recipe: Collard Cobbler with Cornmeal Biscuits
From Food and Wine

Biscuits
1 cup all-purpose flour
1/2 cup coarse yellow cornmeal
2 1/2 teaspoons baking powder
1 teaspoon sugar
1/2 teaspoon salt
5 tablespoons cold unsalted butter, cut into small pieces
3/4 cup half-and-half

Collards
1/2 pound slab bacon, cut into 1-by-1/2-inch sticks
1 large sweet onion, thinly sliced
3 garlic cloves, minced
4 ounces spicy andouille sausage, halved lengthwise and sliced 1/4 inch thick
4 cups Turkey Stock or chicken stock
4 pounds collard greens—thick stems and inner ribs removed, leaves cut into 1-inch ribbons
1 cup plus 2 tablespoons half-and-half
2 tablespoons cornstarch dissolved in 1/4 cup water
Salt and freshly ground pepper

1. MAKE THE BISCUITS In a food processor, pulse the flour, cornmeal, baking powder, sugar and salt. Add the butter and pulse until it’s the size of small peas. Add the half-and-half and pulse just until the dough comes together. Transfer the dough to a lightly floured work surface and knead 2 or 3 times. Flatten the dough slightly and roll it out to a 10-inch square. Cut the dough into 2-inch squares and refrigerate on a baking sheet.

2. MAKE THE COLLARDS In a large pot, cook the bacon over moderate heat until golden and the bacon fat is rendered, about 8 minutes. Using a slotted spoon, transfer the bacon to a plate. Discard all but 1 tablespoon of fat from the pot. Add the onion and garlic and cook over moderate heat, stirring, until softened, 6 minutes. Add the bacon, andouille and 3 cups of the Turkey Stock and bring to a boil over high heat. Add the collards in 3 batches, stirring so each batch wilts before adding more. Cover and simmer over low heat until the collards are very tender, 30 minutes.

3. Preheat the oven to 375°. Add 1 cup of the half-and-half and the remaining 1 cup of stock to the collards and bring to a boil. Stir the cornstarch slurry and add it to the pot. Cook, stirring, until thickened, 2 to 3 minutes. Season with salt and pepper.
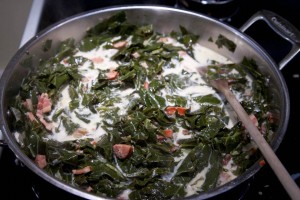
Yum.

4. Transfer the collards to a large ceramic or glass baking dish. Top with the biscuit squares, overlapping them slightly, and brush the tops with the remaining 2 tablespoons of half-and-half. Season the biscuits well with pepper and bake for 50 minutes, or until the greens are bubbling and the biscuits are golden. Let rest for 20 minutes before serving.
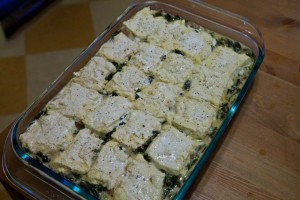
Make Ahead The recipe can be prepared through Step 3 one day ahead; refrigerate the biscuits and collards separately.

Oh yeah, and pie. 🙂 This is the Grandma Ople pie. Again. And I’m sure I’ll make it again soon.
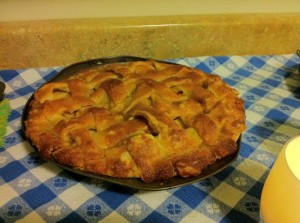
Pie.

November 18, 2011
by katie
1,046 Comments

Snuff by Terry Pratchett

My mother, brother, and I have been big fans of Terry Pratchett for years now. It has become tradition the last few years that my brother sends me the new Pratchett for my birthday. This year, his new book is called “Snuff”. And Pratchett’s still got it.

If you’ve never read any of the Discworld books, I’d highly recommend them. There are about a bizillion by now (ok fine. 39) and they’re all fun in their own ways. I’ve read the entire Discworld series.

And what is the Discworld you might ask? The Discworld is a fantasy world that is a flat disk, riding through space on the backs of four giant elephants, who in turn ride on the back of a giant turtle.

Ok. Sure. Why not?

The stories are generally light and hilarious, with darker subtexts and adventures woven in. Pratchett is much like Douglas Adams of the “Hitchhiker’s Guide to the Galaxy” fame. They both write witty, fun, and fantastical books.

Reading “Snuff” made me want to start rereading the series. Now that winter’s hit, I’ve been having a hard time finding books to get into. Apparently comic fantasy is just what I wanted. Light, funny, and exciting. Just the perfect thing for standing in the rain at the bus stop.

“Snuff” is part of the City Watch series. There are many smaller series in the Discworld collection. Collections of books that follow specific groups of characters. The City Watch books are always fun. Commander Sam Vines is a great character and this book centers around him. When he is forced to take a vacation with his wife in the country, he is still able to find crimes that need to be solved and mayhem that needs to be stopped. It is a crazy wild ride and I flew through the book.

This is probably not the book that you would want to start with in the series. Here is the list of the City Watch focused books:

Guards! Guards! 1989
Men at Arms 1993
Feet of Clay 1996
Jingo 1997
The Fifth Elephant 1999
Night Watch 2002
Thud! 2005
Snuff 2011

Personally, I love the Witch books, but some of my favorites are also the Death series. Death is a hilarious character.

Any way you slice it, the Discworld is a fun place to play. Grab one and get started. You’ll be amazed by the characters, the humor, the stories, the pop culture references, and basically, it will just be a good time.

November 15, 2011
by katie
6 Comments

An Indian Feast

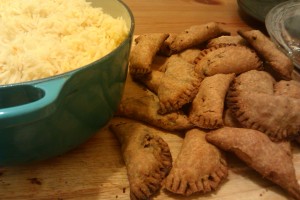
In my last post I showed you the killer pear upside down cake that I made with my friend on our cooking night. Well, even though that was the first thing we made, it wasn’t dinner. We decided to prepare an Indian feast. When it comes to Indian food, my favorite thing has to be samosas. I can make a pretty good curry at home, but sometimes it feels like it is missing the point if there isn’t a big meaty samosa there too, which is why I’ve taken to ordering Indian takeout more regularly than I make it.

But, since I would not be endeavoring to create them on my own, I decided we had to have them for our cooking night. And the adventure began!

Sure, they’re time consuming. Any time you make more than a dozen of something, it is going to take awhile. But, they were really yummy and worth it. And really, it didn’t take any longer than spring rolls do.

I found this recipe on Food and Wine, but it was originally for lamb samosas. I didn’t have any lamb at home though, so I went with beef. It also only called for 1/4 pound of lamb, and I usually don’t bother with recipes with so little meat. So, I made this with a pound and doubled all the seasonings. I ended up with leftover filling, but it was a very good thing. I ended up using it to make an Indian fried rice the next night with the leftover basmati rice and some fried eggs and it was so good!

Now I know that awesome samosas are attainable in my own home. Next time I might try to make them with puff pastry. I would also glaze them before baking with an egg white wash for a prettier finish, but these were pretty darn yummy as is.

Potato and Beef Samosas

1 tablespoon extra-virgin olive oil
1 pound ground beef
1 small onion, finely chopped
1 medium all-purpose potato, peeled and cut into 1/4-inch dice
3 teaspoons Madras curry powder
1/2 teaspoon ground cumin
1/2 teaspoon ground coriander
Salt and a big pinch of cayenne pepper
1/2 cup canned low-sodium chicken broth
1/2 cup thawed frozen baby peas
One 15-ounce package pie crusts

note: It will be easiest if you prep the onion, potato, and seasonings before you start.

1. In a medium skillet, heat tablespoon of the olive oil. Add the beef and cook over moderately high heat until browned. Using a slotted spoon, transfer the beef to a plate. Add the onion to the skillet along with the remaining 1/2 tablespoon of oil and cook over moderately low heat, stirring, until softened, 3 to 4 minutes.

2. Return the beef to the skillet, add the potato and cook until sizzling. Add the curry powder, cumin, coriander and cayenne and cook over low heat, stirring constantly, just until slightly darkened, about 4 minutes. Add the broth and bring to a simmer, stirring, to scrape up any browned bits from the bottom. Cover the skillet and cook over low heat until the meat and potato are tender, about 20 minutes. Remove the lid and cook until the liquid is absorbed. Stir in the peas and season with salt. Transfer to a bowl and let cool completely.

3. Preheat the oven to 400°. On a lightly floured surface, roll out the pie crusts, 1 at a time, to a bare 1/8-inch thickness and cut out a total of 40 rounds with a 2-inch round biscuit cutter. (I used a 3 inch tea cup and made about 30.) Lightly brush the rounds with water, top with a scant teaspoon of the filling and fold in half. Seal the edges a fork. Transfer the samosas to a large baking sheet .

4. Bake the samosas for 30 to 35 minutes, or until the crust is golden. Serve hot or at room temperature.

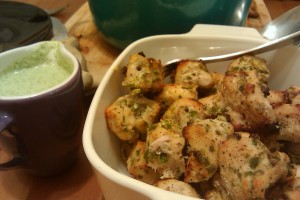
To go with all these yummy samosas, we made a spicy mint raita. This has to be the easiest condiment I’ve come across lately and I’m very excited by it. Every time I order Indian food, I love the little tub of green sauce and now I know how to make it. And what is more, you are about to as well.

Spicy mint Raita

One bunch of mint leaves
One jalepeno, top removed
1/4 cup white vinigar
1 personal sized tub of plain yogurt.
Salt and pepper to taste

Blend first three ingredients. Blend in yogurt. Taste and adjust seasonings and enjoy!

Can’t get much easier than that and it is delicious. I actually learned how to make that a few months ago when my beau and I took an Indian cooking class. The class itself was hilarious, as we had no idea going in that it would consist mostly of women in their 60s. They provided wine, which we were the only ones to drink, and we had a good time despite the bizarre crew. The food was fabulous and I look forward to trying the rest of the recipes soon.

You can also see the rice and the delicious marinated Indian chicken in the pictures that we had. Delicious. I love cooking with friends, which makes me very excited about our upcoming Friends’ Thanksgiving Food Extravaganza. I can’t wait to spend the day cooking and eating and taking pictures.

Happy holidays to us all!

November 14, 2011
by katie
2 Comments

Pear Upside Down Cake

Ever since my Thanksgiving issue of Bon Appetit showed up in the mail, I’ve been excited. I pawed through it, dog-earring pages, looking forward to that epic meal that happens once a year.

I love Thanksgiving.

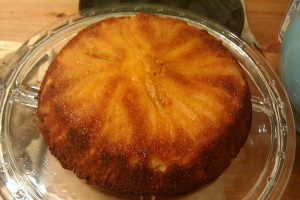
So last week when one of my girlfriends wanted to have a night of cooking, I was excited to try out one of the dessert recipes suggested for Thanksgiving. We made the Pear Upside Down Cake and it was fabulous.

Not only beautiful, but insanely delicious. This thing certainly passed the test and will be included on the Thanksgiving menu. In fact, I might have to make two so there are plenty of leftovers.

I liked this cake so much because it isn’t terribly sweet. It has a delicate, moist crumble to it and the small amount of cornmeal gives it a slightly grainy texture that complements the natural graininess of the pears. The caramel and the juices released from the pears are a delightful combo that soaks through the cake, making it taste just fabulous. I highly recommend making this dessert part of your Thanksgiving dinner, or for that matter, any dinner.

The only downside was there were a lot of steps, but it wasn’t terribly hard. Just more time consuming than I had originally invisioned. I also don’t have a cake pan, so we made it in a pie plate, which worked just fine and aesthetically, I liked the domed sides just as much as I think I would have liked vertical sides.

Bon Appetit’s Pear Upside Down Cake

Ingredients
• 9 tablespoons unsalted butter, room temperature, divided, plus more
• 3/4 cup plus 3 tablespoons unbleached all-purpose flour
• 3 tablespoons coarse yellow cornmeal or polenta
• 1 1/2 teaspoon baking powder
• 1/4 teaspoon kosher salt
• 1 cup sugar, divided
• 2 medium pears-about 1 pound (although I couldn’t fit two whole pears in the pan)
• 1 teaspoon vanilla extract
• 2 large eggs, separated
• 1/2 cup whole milk
• Whipped cream or caramel gelato or vanilla ice cream (optional)

pan:
An 8″-diameter round cake pan with 2″-high sides or a pie plate

Preparation
• Preheat oven to 350°. Butter pan; line bottom with a parchment-paper round. Whisk four, cornmeal, baking powder, and salt in a small bowl. Stir 1/4 cup sugar and 2 tablespoons water in a small saucepan over medium-low heat until sugar dissolves. Increase heat to medium-high. Boil syrup without stirring, occasionally swirling pan and brushing down sides with a wet pastry brush, until sugar turns dark amber, 8–10 minutes. Remove pan from heat; add 1 tablespoon butter (caramel will bubble vigorously) and whisk until smooth. Pour caramel into prepared cake pan and swirl to coat bottom.

• Peel, halve, and core the pears. Place flat on a work surface and cut lengthwise into 1/8″-thick slices. Layer slices over caramel, flat side down, overlapping as needed.

• Mix remaining 3/4 cup sugar, 8 tablespoon butter, and vanilla in a large bowl. Using an electric mixer, beat on medium speed until light and fluffy, about 3 minutes. Add yolks one at a time, beating to blend between additions and occassionally scraping bowl. Beat in flour mixture in 3 additions, alternating with milk in 2 additions, beginning and ending with flour mixture.

• Using clean, dry beaters, beat egg whites on low speed in a medium bowl until frothy. Increase the speed to medium and continue to beat until whites form soft peaks. Fold about 1/4 of the whites into cake batter. Add in remaining whites; gently fold just to blend. Pour batter over pears in pan; smooth top.

• Bake cake, rotating pan halfway through, until top is golden brown and a tester inserted into the center comes out with a few small moist crumbs attached, about 1 hour. Let cool in pan on a wire rack for 30 minutes. Run a thin knife around the inside of pan to release cake. DO AHEAD:Can be made 1 day ahead. Store airtight at room temperature.

• Invert cake onto a plate; remove parchment paper. Serve warm or at room temperature with whipped cream or caramel gelato, if desired. (I also had a piece the other night with Ben and Jerry’s Vanilla, Caramel, Chocolate swirl and thought I had died and gone to heaven.)

November 4, 2011
by katie
1,033 Comments

Apple Pie by Someone’s Grandma Ople

What celebrates fall more than the smell of apple pie baking?

Since the most prevelant fruit provided by my organic farm delivery service last week was apples, I was inspired to embrace it and bake an apple pie. I’ve made many an apple pie, and my favorite has always tended to be an apple crumb pie recipe that I started making in high school. However, I came across this recipe online this week and it was so different and interesting that I had to give it a try.

I found this “Apple Pie by Grandma Ople” on Allrecipes.com. Needless to say, Grandma Ople is not my grandmother, but I’m very glad to have access to her recipe. This pie is delicious. Thank you Ms. Ople!


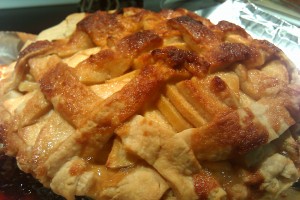
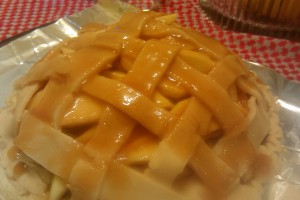
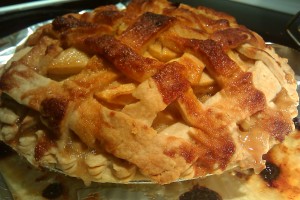
The recipe is interesting because instead of mixing the sugars up with the apples before pouring it into the pie crust, you pile the apples in the crust before adding sugar and then make a carmely sugar syrup to pour all over the top of the pie, including the crust. This method gives the sugar a richer taste and also crisps up the top of the pie crust in a really wonderful way.

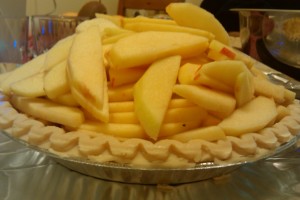
I think this is my main go-to apple pie recipe now. Next time, I might shake it up with a little cinnimon added, or a dash of vanilla, but this is a pretty perfect basic pie. I stuck strictly with the recipe with one exception. I only used 6 apples and they were gala. I don’t see how you could fit 8 apples in that pie crust! Mine were a structural, overflowing marvel as was. And I used a frozen pie crust because it is easy and it turned out delicious.

Apple Pie by Grandma Ople

Ingredients
1 recipe pastry for a 9 inch double crust pie
1/2 cup unsalted butter
3 tablespoons all-purpose flour
1/4 cup water
1/2 cup white sugar
1/2 cup packed brown sugar
8 Granny Smith apples – peeled, cored and sliced

Directions
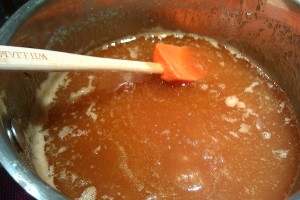
1. Preheat oven to 425 degrees F (220 degrees C). Melt the butter in a saucepan. Stir in flour to form a paste. Add water, white sugar and brown sugar, and bring to a boil. Reduce temperature and let simmer. It will become a beautiful caramel color while you work on the next step.

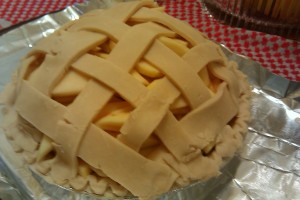
2. Place the bottom crust in your pan. Fill with apples, mounded slightly.

Cover with a lattice work crust.

Place on a cookie sheet that is covered in foil for easier cleanup. Gently pour the sugar and butter liquid over the crust. Pour slowly so that it does not run off.

3. Bake 15 minutes in the preheated oven. Reduce the temperature to 350 degrees F (175 degrees C). Continue baking for 35 to 45 minutes, until apples are soft.


Enjoy with a scoop of vanilla ice cream on top. You’re going to love this.

October 31, 2011
by katie
106 Comments

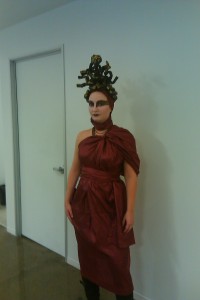
Medusa for Halloween

The last few years, I’ve gone all out for Halloween. I’ve made a dragon costume, gone as the Queen of Hearts, and even a charming Scarlett O’Hara. This year was not any different. I decided to be Medusa this year. But more than that, I also kinda wanted to be a drag queen. So, I took inspiration from those crazy bitches on Ru Paul’s Drag Race and made a Medusa costume fit for a queen.

Pun intended.

I had to begin by asking myself how to go about making a huge snake hat to wear on my head. First of all, I wanted something lightweight. I didn’t want some heavy, sandfilled snakes on my head. And I wanted them solid. I didn’t want to have to reshape them everytime I bumped into something, (which I did all night, as I seemed to have a hard time knowing how much space my head was taking up.) Oh, and I had a bunch of newspapers in the house, so I wanted to paper mache.

I came up with a plan. Unfortunately, I didn’t take pictures of my early steps. Honestly, for some reason I seemed to have a hard time getting psyched up about my costume craft this year. I think it is a resentment towards the cold weather that makes me not want to embrace the fall fun stuff. But, I pulled myself together and made it rock in the end and I took some pictures of the final steps.

First step, find a buckrum hat form. I made one that fit snugly on my head. I suppose it wouldn’t need to be buckrum, mearly something solid in structure with holes.

Then I braided together pipe cleaners to make them thicker and more sturdy. I pushed one unbraided end into the buckrum and twisted on the underside so that the pipe cleaners stood straight out from the top of the hat and were attached on the inside. I did that all over the hat until I thought I had enought snakes. I went for a snake mohawk look, just making the top stand out and wrapping them around the sides. This did two things. It made for a great look and also greatly reduced the time and effort it would have taken to do the whole head.

The next step was to thicken up my snakes. I wanted them to have some girth, but not weight. I came up with the perfect solution. Bubble wrap. So, I wrapped a thin sheet of bubble wrap around each pipe cleaner and then used painters tape to hold in place. At this point, things look pretty snakey. This is the time to bend the snakes around and figure out how you want them to look. I found they looked great and were sturdier when they were leaning on and twined around each other.

Once all the bubble wrap snakes are formed, it is time to paper mache!

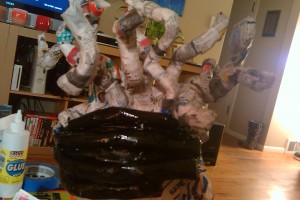
In case you haven’t ever done paper mache, it is really simple. Basically, you get some plain white glue and mix it with water until it is thin, but still very sticky. Maybe a 1-1 solution. Then take strips of newspaper and dip them in the glue, wiping off excess, and lay them on the bubble wrap. Your hands will be covered with glue and there is nothing to do about that. Smooth the newspaper down so that there aren’t bumps. I did about two layers on my hat, allowing for drying time in between. I wanted to make sure it was sturdy.

Here is the hat covered in the paper mache.

Once I was happy with the smoothness and strength from the paper mache, I painted it black.

Once that was done, I used the paint to attach glitter. I would paint sections that I wanted to glitter and then sprinkle it over. That prevented inconsistancies in the color that glue might have created.

And voila!

A fabulous Medusa hat!

In case you are now wondering about the awesome “Black Swan” type eyes, I watched the following tutorial, which gave me the inspiration to make my scaley eyes. I used black liquid liner, copper liner, and some gold shadow in select spots. http://www.youtube.com/watch?v=SZwaKDaSgqY

To finish my costume, I made a toga style dress out of some curtains I had around and made a head wrap to hide my hair under the hat.

I am proud to say that I won my company’s costume contest in the Scariest Costume category, which suits me just fine. I wanted to be both fabulous and terrifying, and I’m pretty sure I pulled it off.

So now, rock out! Happy Halloween!!!

October 19, 2011
by katie
1 Comment

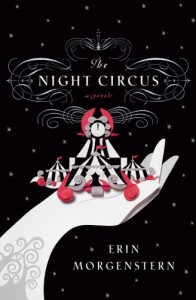
The Night Circus

Ah. The Night Circus. This book was just what I needed right now. I even started another book, but just couldn’t get into it. I needed something magical. Something light and beautiful and I found it.

“The Night Circus” by Erin Morgenstern was a lovely book. When it was recommended to me, I was told that it was like Harry Potter for adults. Now, first of all, Harry Potter is for everyone. Secondly, this book was similar in that it was a book full of magic, but that’s about it.

Basically, this book is about two magicians/illusionists/manipulators, who both train proteges to compete against each other. It is a competition to prove which method of magic is the best. The competitors are pitted against each other and their forum is… the night circus. The characters don’t directly attack each other; they compete by trying to create something more magical than their opponent in the circus.

Which means, this is one circus you would really want to visit. The descriptions of the various tents and the magical things you find inside are by far the best part of the book. Gardens made entirely from ice, carosels where you can feel the breathing of the magical animal you are sitting on, and dozens of other wonders that I don’t want to spoil for you.

In the words of Liz Lemon, “I want to go to there.”

I would give just about anything for the night circus to be real and to be able to visit. If it was real, I would be a “revuer”. In the book, the circus is called “Le Cirque des Reves”, which is French for “The Circus of Dreams”. The revuers (or “dreamers”) are the people who visited the circus and fell so in love with it that they follow the circus around. (Which is challenging considering the circus seems to just appear and disappear randomly in different cities. It is magic after all.) They form a society to speak about the wonders that they encounter there. These guys were serious fans. I want to be one.

So in addition to the beautiful circus that you get to wander through, there is a nice amount of drama and backstory and a tale of star-crossed lovers, which always makes for good literary intrigue. It wasn’t my favorite plot ever, but it kept the book going and the magic made the book sparkle.

This is a perfect winter read to help perk up the spirit and the soul. Check it out.

October 18, 2011
by katie
170 Comments

Serious cookies

Somedays, a chocolate chip cookie just isn’t enough. On cold, rainy days sometimes you just need a little extra something.

This weekend, I had a serious cookie craving. I wasn’t feeling top notch, and needed something sweet and comforting and maybe a little salty even. I looked through many of my cookbooks, not finding the perfect thing. Turns out, with my bazillion cookbooks, I have very few that spend any time on cookies, which in recent years have become one of my favorite desserts, or snacks, or breakfasts.

Finally, I decided to make an old favorite. Ben and Jerry’s Giant Chocolate Chip Cookies. This is from their classic cookbook, “Ben and Jerry’s Ice Cream and Dessert Book”, which not only is an awesome cookbook, but has tons of hilarious stories about the creation of their company and their classic ice creams.


I decided to step up the recipe a little bit, and I’m sure they wouldn’t mind. I cut out the walnuts and only used 3/4 cup of chocolate chips (because that is what I had in my cupboard). However, to make up for the 1/4 cup of missing chips and the 1/4 cup of missing walnuts, I added a chopped up snickers bar.

That’s right, chopped up snickers bar in my cookies.

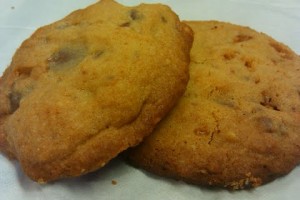
I have to tell you, I was thrilled with the results. The cookies are a little salty and parts are nicely carmalized and chewy. These are some serious cookies. Make these. But, try out the original as well. Ben and Jerry know what they’re doing.

Serious cookies
aka Ben and Jerry and Katie’s Chocolate Chip Snickers cookies

Ingredients:
1/2 cup butter, at room temperature
1/4 cup granulated sugar
1/3 cup brown sugar
1 large egg
1/2 teaspoon vanilla extract
1 cup all-purpose flour, PLUS 2 teaspoons all-purpose flour
1/2 teaspoon salt
1/2 teaspoon baking soda
3/4 cup semisweet chocolate chips
1 Snickers bar, chopped, about 3 oz.

PREPARATION:

Preheat the oven to 350F. Beat the butter and both sugars in a large mixing bowl until light and fluffy. Add the egg and vanilla extract and mix well.

Mix the flour, salt, and baking soda in another bowl. Add the dry ingredients to the batter and mix until well blended. Stir in the chocolate chips and Snickers. Drop the dough by small scoops 2 to 3 inches apart on an ungreased cookie sheet. Flatten each scoop with the back of a spoon to about 3 inches in diameter.

Bake until the centers are still slightly soft to the touch, 11 to 14 minutes. Let cool on the cookie sheet for 5 minutes, then transfer to racks to cool completely.

October 5, 2011
by katie
1,095 Comments

New painting, playing with blending

Saturday night I stayed in and I stayed up painting. Inspiration to create had struck. I played with brushes and blending instead of my go to of late, the palatte knife craziness. And I have to say, I’m really pleased with the results. It had been quite a while since I got such a smooth effect on my canvas.

I’m also happy with the colors and how they turned out. I don’t usually work with browns, but was pleased with the golden effect that I accomplished.
This is a closer view of the bottom half.

Hope you like it as much as I do!