Katie Stew

A rich, simmering blend of my favorite things

December 5, 2013
by katie
1,024 Comments

Pecan Bars

Winter is a time for Pecan Pie. Thanksgiving, Christmas, or any special occasion during the cold months. My sister in law and I made these last year for a party and they were delicious!

IMG_0682Now generally, I’m not the biggest fan of Pecan Pie. It is generally too rich and gooey for my tastes. So, when a request was made for pecan pie, I did not have anything up my sleeve. So, we did what I always do when in doubt about food, we turned to the Contessa and found these wonderful bars. 

IMG_0684
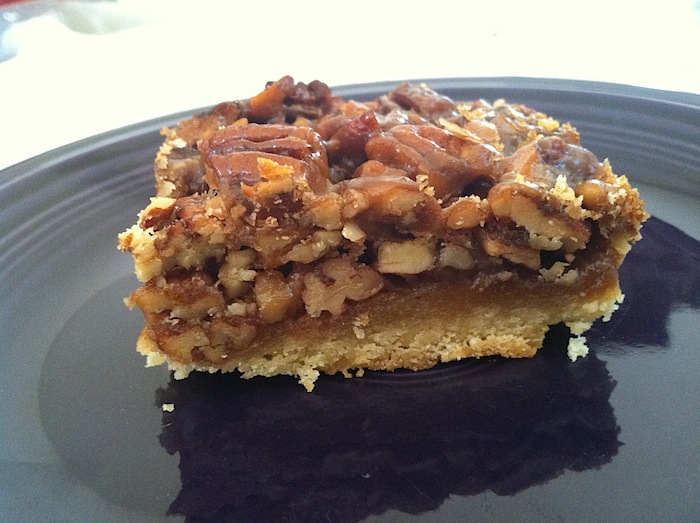
These are basically short little pies on top of a beautiful shortbread crust. The cookie crust is divine. The citrus zest brings a refreshing zing. These make for very decadent bars that are sure to be a pleaser.

IMG_0683
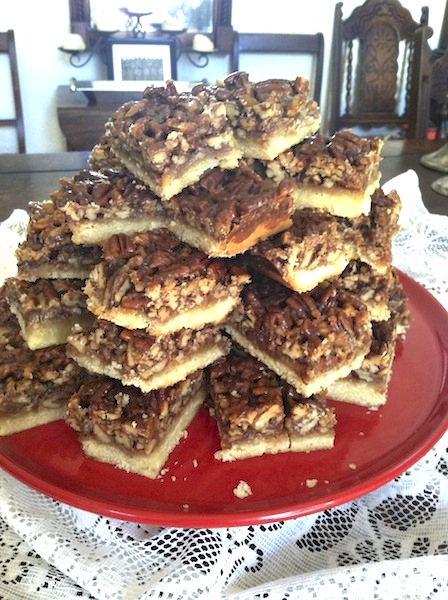
Doesn’t that just look yummy?

IMG_0685 I have one very important tip for this recipe. When I followed it as is, it made an insanely large mess in my oven, which the day before the a party is really annoying. That is why I suggest that you line the oven with foil. If you have a very high lipped cookie sheet, that could help as well. The problem is, while it will all fit in the cookie sheet after you pour the topping on, it won’t exactly stay there. As the bars are cooking, the sugary nut concoction will boil and overflow the pan. If you don’t put anything under it, you will have a heck of a mess to clean up. Also, be careful pulling from the oven so that you don’t end up with hot syrup on your wrists. That would be bad.

But, despite all that, these are absolutely worth your while. The recipe makes a ton of these wonderful bars. Enjoy!

Pecan Bars 

Recipe from the Barefoot Contessa

Ingredients
Crust:
1 1/4 pounds unsalted butter, room temperature
3/4 cup granulated sugar
3 extra-large eggs
3/4 teaspoon pure vanilla extract
4 1/2 cups all-purpose flour
1/2 teaspoon baking powder
1/4 teaspoon salt
Topping:
1 pound unsalted butter
1 cup good honey
3 cups light brown sugar, packed
1 teaspoon grated lemon zest
1 teaspoon grated orange zest
1/4 cup heavy cream
2 pounds pecans, coarsely chopped

Directions
Line the bottom of the oven with foil. Preheat the oven to 350 degrees F.

For the crust, beat the butter and granulated sugar in the bowl of an electric mixer fitted with a paddle attachment, until light, approximately 3 minutes. Add the eggs and the vanilla and mix well. Sift together the flour, baking powder, and salt. Mix the dry ingredients into the batter with the mixer on low speed until just combined. Press the dough evenly into an ungreased 18 by 12 by 1-inch baking sheet, making an edge around the outside. It will be very sticky; sprinkle the dough and your hands lightly with flour. Bake for 15 minutes, until the crust is set but not browned. Allow to cool.

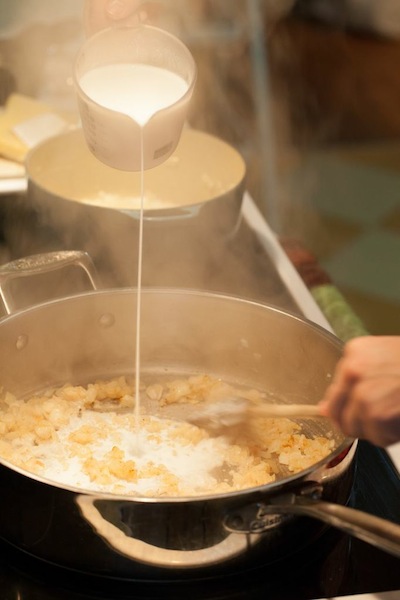
For the topping, combine the butter, honey, brown sugar, and zests in a large, heavy-bottomed saucepan. Cook over low heat until the butter is melted, using a wooden spoon to stir. Raise the heat and boil for 3 minutes. Remove from the heat. Stir in the heavy cream and pecans. Pour over the crust, trying not to get the filling between the crust and the pan. Bake for 25 to 30 minutes, until the filling is set. Remove from the oven and allow to cool. Wrap in plastic wrap and refrigerate until cold. Cut into bars and serve.


December 1, 2013
by katie
975 Comments

Preserved Peaches

This website was insanely helpful. It will tell you anything you need to know about canning peaches.

_MG_4077In fact, I’m not even going to publish a recipe here on this, because that other website was so insanely helpful and tells you all you need to know. _MG_3995I will tell you that the method of dropping the peaches in boiling water for a few seconds and then dropping them in ice water was a great trick. The skins slid off so easily. It saved me a lot of time peeling peaches, and a it saved a lot of peach that would have come off with the peels. _MG_4007It also made the most beautiful sight. The skinless peaches were beautiful. There can’t be enough pictures of them really.
_MG_3987

I love fruit cups. For years I always kept them stocked in the fridge. They were a great snack. A sweet treat. But I stopped buying them when I started reading the labels. Too much sugar. Too many preservatives. Too much stuff that I couldn’t pronounce. But, after my canning class, I came to realize there was no reason I couldn’t just make my own. _MG_4066 So now I have a pantry shelf full of homemade fruit cups. It wasn’t a hard process. It wasn’t complicated. It is basically just peaches in a simple syrup. I added a little cinnamon and was done. I used the “medium syrup” from the peach canning site. _MG_4067And I know this may be an over the top number of photos of canned peaches, but I just couldn’t choose. They were all just so beautiful. 
_MG_4080They will make me think of summer in the dark rainy winter months. They will taste like sunshine. _MG_4082I only wish cherries were still in season when I started this canning adventure. Then I would have some nice cherries to put in my Manhattans. And though peaches are pretty much done for the year as well, it is the perfect time to get some pears cooked up and saved in your pantry. That way you’ll have some fruit to enjoy in February that didn’t come from the other side of the world.

Enjoy.

Photographs by Jessica Yager

November 25, 2013
by katie
1,138 Comments

Spicy Pickled Asparagus

Maybe this post is kind of cheating. Why? Because this is the same recipe as the pickled green beans and carrots from last week, but with asparagus. But you know what? I’m posting it anyways because pickled asparagus is pretty and there were already a bunch of photos in the other post.

So there. _MG_4037Anyways, when I did the pickled green beans and carrots, I had some leftover brine. So I ran to the store, bought some asparagus, and made a few jars of asparagus too. I’m so glad that I did! They are just delicious and a nice, salty, sour, tangy treat.
_MG_4012Last week I opened up my first jar of the pickled veggies since I canned them and I can’t stop eating the pickled green beans! They are so crisp and delicious. My new favorite fridge treat. I’m saving the asparagus for Thanksgiving. (If I can fight the urge to devour them that long. I guess we’ll see.)

Enjoy!

Pickled Asparagus

Original recipe makes 6 – half pint jars
  • 3 pounds thin asparagus spears
  • 2 1/2 cups distilled white vinegar
  • 2 cups water
  • 1/4 cup salt
  • 6 cloves garlic, peeled
  • 1 bunch fresh dill weed
  • 3/4 teaspoon red pepper flakes

Directions

  1. Get a very large pot of water very hot. If you do not have a canning pot with a rack to keep the glass from touching the bottom of the pan, then a steamer basket works well, as long as the water is high enough to cover the top of your jars. Sterilize 6 (1/2 pint) jars with rings and lids. Set them somewhere clean to dry. Trim asparagus to 1/4 inch shorter than your jars.
  2. In a large saucepan, stir together the vinegar, water and salt. In each jar, place 1 sprig of dill, one clove garlic, and 1/8 teaspoon of red pepper flakes. Pack asparagus into the jars so they are standing on their ends.
  3. Ladle the boiling brine into the jars, filling to within 1/4 inch of the tops. Wipe the rims clean with a clean cloth. Seal jars with lids and rings. Place in a hot water bath so they are covered by 1 inch of water. Simmer but do not boil for 10 minutes to process. Remove and set somewhere out of the way to cool. Do not touch for 24 hours. Test jars for a good seal by pressing on the center of the lid. It should not move. Refrigerate any jars that do not seal properly. Let pickles ferment for 2 to 3 weeks before eating.

Photographs by Jessica Yager

November 14, 2013
by katie
1,218 Comments

Apple Sauce

Apple Sauce. _MG_4002So simple. So delicious. It seems almost like kid stuff. I know I ate a ton as a kid, but then again, I also ate a ton of apple sauce in my dorm room at college. Last summer I made batch after batch of apple sauce from the tree in my backyard. This year, instead of harvesting the buckets and buckets that I did last year, I think there were about half a dozen apples on my tree and I didn’t get to eat any of them before the squirrels got to them. I’ve been told that apple trees cycle through years of abundance and years of very little, but it was still a bummer. _MG_3951But luckily, living here in Washington, there is certainly no shortage of apples. I hit up my local farmer’s market and bought a five pound bag of fresh picked apples and went to funky town. Or, I made apple sauce with them. You know what I mean. _MG_3958But unlike last year, I canned the sauce so that I could keep it in my pantry all winter. Last year, I froze small portions of the apple sauce, which worked just fine, but was less than perfectly convenient. I would have to set some of the little jars in the fridge the night before I wanted to eat them to thaw out, and who thinks a day ahead about if they’ll want apple sauce? Now I’ll just have to grab it off the shelf and dig in! Just like the little cups of Mott’s you can buy at the grocery store, but when you make your own, you can control how much sugar you want (and you can even add some booze!). _MG_3978When you are making your apple sauces, I encourage you to experiment. I told you last week about a canning class I went to. When we were there, we made two kinds of apple sauce. One had lots of apple brandy in it. It was delicious and my favorite. But, we also made another kind. One with sage and rosemary cooked in with the apples. The herbs were chopped very finely and they added a delicious, fresh, herbal flavor to the apples. I wouldn’t have thought of putting fresh herbs in my apple sauce, but it was a real treat.

You will find my original recipe for apple sauce here. Make the sauce according to those directions and then can them like this:

1.) Prepare boiling water canner, or large stock pot with a strainer that will keep the jars off of the bottom of the pan. Heat jars and lids in simmering water until ready for use. Do not boil. Set bands aside.
2.) When the apple sauce is ready, remove jars from hot water and set somewhere clean. Allow to dry. Ladle hot applesauce into hot jars leaving 1/2 inch headspace. Wipe rim clean. Center lid on jar. Apply band until fit is fingertip tight.
3.) Put jars in a simmering water for 20 minutes. Remove jars and cool. Check lids for seal after 24 hours. Lid should not flex up and down when center is pressed.

Should keep for one year in your pantry. Store canned goods out of direct sunlight. Enjoy!

Photographs by Jessica Yager

November 11, 2013
by katie
1,140 Comments

Spicy Pickled Carrots and Green Beans

I’m going to warn you. The next two weeks, there may be an absurd number of photos in each post. Why? Because they were all too darn pretty and I just have to share them all. Well ok, not all or we would be here all day, but a fair amount.

A few weeks ago, I tried canning for the first time. I went to a canning class with a friend and the whole thing was demystified for me. I love it. It seems almost like magic really. You can put whatever you want in a jar, heat it, seal it, and it can live on your shelf for a year. I guess I had always assumed that it was more complicated, that you had to have some kind of special preservatives that you add or something. _MG_3894But no. It is not a complicated process and it is very satisfying. Over the next two weeks, I’m going to share four recipes for canning things and I’ll share even more pictures. _MG_3887

When I was at the canning event, one of the hosts had made her own sweet pickled asparagus and it was delicious. I knew immediately that I wanted to pickle some green beans. With this brine recipe, I decided to do some carrots, some green beans, and some combo jars.

First up, find some beautiful carrots.

_MG_3868And then some green beans too._MG_3880Don’t these just look like something you want to take on a picnic? I am looking forward to adding these to an appetizer tray this Thanksgiving. And I imagine they will be shipped out over the holidays this year in gift baskets as well. But, they have to sit for 2-3 weeks to pickle, so start thinking about making these soon!
_MG_3940

Spicy Pickled Carrots and Green Beans

Original recipe makes 6 – half pint jars
  • 1 1/2 pounds fresh green beans
  • 1 1/2 pounds fresh carrots, quartered if thick
  • 2 1/2 cups distilled white vinegar
  • 2 cups water
  • 1/4 cup salt
  • 6 cloves garlic, peeled
  • 1 bunch fresh dill weed
  • 3/4 teaspoon red pepper flakes

Directions

  1. Get a very large pot of water very hot. If you do not have a canning pot with a rack to keep the glass from touching the bottom of the pan, then a steamer basket works well, as long as the water is high enough to cover the top of your jars. Sterilize 6 (1/2 pint) jars with rings and lids. Set them somewhere clean to dry. Trim green beans and carrots to 1/4 inch shorter than your jars.
  2. In a large saucepan, stir together the vinegar, water and salt. In each jar, place 1 sprig of dill, one clove garlic, and 1/8 teaspoon of red pepper flakes. Pack green beans and carrots into the jars so they are standing on their ends.
  3. Ladle the boiling brine into the jars, filling to within 1/4 inch of the tops. Wipe the rims clean with a clean cloth. Seal jars with lids and rings. Place in a hot water bath so they are covered by 1 inch of water. Simmer but do not boil for 10 minutes to process. Remove and set somewhere out of the way to cool. Do not touch for 24 hours. Test jars for a good seal by pressing on the center of the lid. It should not move. Refrigerate any jars that do not seal properly. Let pickles ferment for 2 to 3 weeks before eating.

_MG_3899

Photographs by Jessica Yager

November 7, 2013
by katie
1,151 Comments

The Ocean at the End of the Lane

I recently read “The Ocean at the End of the Lane” by Neil Gaiman. My brother sent me this book for my birthday this year because he knows how how much I love Neil Gaiman. He is a a wonderful storyteller. He shows us that even in our modern times, there can be magical worlds hidden right below the surface of our lives.

The Ocean at the End of the LaneThis story is about a man that returns home for a funeral. He has not been there in a long time, and as he approaches his childhood home, he is flooded with memories from childhood that he had forgotten for many years. Something very bizarre and magical happened to him when he was a child. As he had grown older, he had pushed the impossible out of his mind and had forgotten the strange occurrences.

The majority of the story is told from the point of view of the man as a child. We are thrown back thirty years and experience the magic and the point of view of a young boy. He encounters both terrible creatures and protectors of this realm. He must learn to believe in a larger world than he had ever considered and understand that a pond can also be an ocean.

My favorite thing about the book is the way that Gaiman shows the relationship between the children and the adults in the book. There is one point when the little boy has something very weird happen to him and he just assumes that is something that everyone goes through and doesn’t tell an adult about it. It is a great moment that illustrates how a child sees the world differently. He believes the adults know everything and can be trusted until he learns that neither are true.

This book was a very fun read. It was a magical fairytale. It reminded me of Coraline, but a larger, more fleshed out story. There was some adult content in it that make it not quite a children’s book, but instead it is a children’s book for adults. It was a very enjoyable read and I can’t wait to pass my copy of the book around for others to enjoy too.

November 4, 2013
by katie
1,240 Comments

Spinach Gratin

I love casseroles, pasta bakes, and gratins. What is not to love about dishes where you toss everything into a pan and let it cook until the cheese is melty and the top is browned? And now that the weather is cooling down, I can turn on the oven again without feeling like my house is a sauna. One of the perks of fall.

I find however that it is hard to get a beautiful picture of something so simple. Luckily, I worked with a wonderful photographer, Jessica Yager, who made this gratin look as good as it tasted.

U5an_LSv8MY9dL6ANsA_2dTwZObvCWplC9PBvoJcDFQ,kiGV6D9QfPppKTKoChnWWvMHUI8jgHDRfvFzVUbMtns,sDe4bXfdx7gB9W96vVRbdrT9IVBEu9qCJ8HWGY8Qois,QvtPbf8eKDkniYWh0NSUHkcPJ0avp_X3mp2w-UoBf84
This is a delicious side. It is rich and gooey, but still feels a little good for you because it is so green. The browned cheese on the top is my favorite part. I have made this for dinner parties and we also used it as a side at Thanksgiving last year. It makes a large quantity, so make it for a crowd, half it, or do like me and just eat it for lunch every day for the next week.

9yC5DeBVv4xolt9Ot9lvgac-JX1RG3NR6fZGJGUY20o,BkLYYr61NnEjmt9zv3Xr4Fuu1KQJrSiEpjLJMOQLu5Q,pU0AX_qCAEIzTYlBrHMHhvvJvKogcKIR1JFASMwth_s,TDvfwMDo-QgMblgy80q6kRo1I6AVmC-VzX6WSJFgTXA,BDV2YCQzUM_yOp8wfNmwIEpfosN3o2KuAbbufcKiJkMThe last time I made this was served alongside Lemon Couscous and Lemon Roasted Chicken and it was delicious.

Spinach Gratin

Ingredients
4 tablespoons (1/2 stick) unsalted butter
4 cups chopped yellow onions (2 large)
1/4 cup flour
1/4 teaspoon grated nutmeg
1 cup heavy cream
2 cups milk
3 pounds frozen chopped spinach, defrosted (5 (10-ounce) packages)
1 cup freshly grated Parmesan cheese
1 tablespoon kosher salt
1/2 teaspoon freshly ground black pepper
1/2 cup grated Gruyere cheese

Directions
Preheat the oven to 425 degrees F.

Melt the butter in a heavy-bottomed saute pan over medium heat. Add the onions and saute until translucent, about 15 minutes. Add the flour and nutmeg and cook, stirring, for 2 more minutes. Add the cream and milk and cook until thickened.

IWZM2drXIzwWnXIqvSZy1RlZnbJAdFUaOeNGkUYzKW4,8UeEbOuCzCVadVEprk7SxofG-XAWmeJlrLN9tX6t0SI,5I_DpD2KgHJKA2RKLucantVz9PndWdJe1CE6zqQKeCU,tI_6PHNsoG5yMZ4u8GDwcU2ZBlOnEGnbIqkMvtuJXc4Squeeze as much liquid as possible from the spinach and add the spinach to the sauce. Add 1/2 cup of the Parmesan cheese and mix well. Season, to taste, with salt and pepper.

Transfer the spinach to a baking dish and sprinkle the remaining 1/2 cup Parmesan and the Gruyere on top.8zn-A2PbvPrrtSZR8obinSzE8NrmgnDpBZTl5qf48Ok,F2j0jgDpaiTrvzK3SdNIJyyM-D21IjdK-rDYguEx3lI,2loffL1iGTD6IFh3AVVo7xl8iPjjq0XRJWOYmr-EDJABake for 20 minutes until hot and bubbly. Serve hot.

3LKQ79bxlx6Ds2A77rESdNb6fz4aY8AmjDF71i3qEoI,0PdyLn3iQ9c0E9y94eZDruzw_Us4VbqA7wf3RxQmwVo,ABE7UhyO-xRmbn76Szn6UDbBRRUh5dri8IVcGT3eSk4,C7UoPbUwZWqtcbM9zBJoekv_SlRXCWb8jD6rKYlPFTIPhotographs by Jessica Yager

October 28, 2013
by katie
739 Comments

White Chocolate Bones

Time for one more party post before Halloween! I hope your plans are made and costumes are assembled. I’ve decided to be the goddess of Autumn this year. Is that a weird thing? Maybe. But, I’m really digging all the red and gold this fall and decided to let it inspire me.

Speaking of inspiration, let’s talk about more adorably spooky Halloween treats. Today I bring you White Chocolate Bones. Are you familiar with those white chocolate covered pretzels called Flipz? We went through a phase in my house a few years back where they were a serious addiction. I had to stop buying them because we would just demolish a container of them at a ridiculous speed. These Halloween treats? Just like homemade Flipz, but holiday specific so I won’t make them all the time.
_MG_3698Probably not anyways.

There is nothing complicated about this recipe, but I learned a few tricks in the making. It helps if the cookie sheet you put the freshly dipped bones on is cold. It helps the chocolate not spread all over the sheet. Also, let the chocolate in the double boiler cool until it is just a little above solid. The chocolate will slide right off your bones if it is too hot. And if you are like me and decide to add a little rum to your chocolate, it will take far longer than half an hour in the fridge to solidify.

And finally, if you don’t get the coverage of chocolate on the bones to make them completely white (like I did), just sprinkle them with some powdered sugar. What is important is that they will taste delicious either way. _MG_3708And while this might look like a kid snack, I’ll tell you this. Four adults cleaned out my entire batch over the course of an evening.

Happy Halloween!

 White Chocolate Bones

recipe from Epicurious

Ingredients

  • 1 (12-ounce) package white chocolate chips (2 cups)
  • 36 pretzel sticks and rods of various sizes
  • 72 mini-marshmallows (about 1 cup)

Preparation

1. Line a rimmed baking sheet with parchment or wax paper.

2. Place the chips in a double boiler over just-simmering water and melt, stirring frequently. As soon as the chips are just melted (there may even be a few solid ones left), remove the pan from the heat and remove the top section of the double boiler so the chocolate’s temperature doesn’t keep rising.

3. Stick marshmallows onto both ends of the pretzels, with the marshmallows’ flat sides parallel to the pretzel.

4. Dip each pretzel in the chocolate and lift out with a fork, letting the excess drip back in the bowl. Lay the bones on the baking sheet and refrigerate for 30 minutes to harden the chocolate. Store in an airtight container in the refrigerator or at a cool room temperature.

Photographs by Jessica Yager

October 24, 2013
by katie
735 Comments

Bloody Marys

What drink could be more appropriate for Halloween than a drink that already has the word “bloody” in the title? And better yet, a cocktail that ties into a urban legend?
_MG_3671The histories of the drink Bloody Mary, and the terrifying truth or dare party game Bloody Mary are ill defined. There are multiple stories of how the drink was created and multiple tales of the legend of Bloody Mary.

Some say the legend of Bloody Mary is based on Queen Mary of England, who was nicknamed Bloody Mary because of her brutal persecution of protestants. Others say that it is a spin of an old wives tale that said that if a young woman walked backwards with a candle and a hand mirror, she would see the face of the man she would marry. If she saw a skull, it would mean that she would die before her wedding day.

Creepy.

But anyways, my favorite Bloody Mary tale is the one that I learned when I was a kid at sleepovers. The story is that if you go into a darkened room with only a candle and stare into a mirror, and you said “Bloody Mary” three times, a horrible ghost would appear to you, covered in blood and scare the crap out of you. Some even said she would try and scratch out your eyes, or otherwise harm you.

Kids are weird.

But, divination and connections to the spiritual realm have long been associated with mirrors. All I know is that when I was a kid, around the third “Bloody Mary”, we would usually start screaming/giggling and run off before she showed up. So, as you are drinking your Bloody Mary, maybe you and your friends should test your courage and see if you can call forth the terrible visage of Bloody Mary this Halloween. Could be a scream.

Now, back to the cocktail. According to Wikipedia, the Bloody Mary has been called “the world’s most complex cocktail”. It is a hangover cure and the way to start a day of drinking. And with the spooky addition of garnishes here, made to look like eyeballs, it is perfect for your Halloween festivities. _MG_3675


Bloody Mary

  • 1 tsp lemon juice
  • 2 oz Vodka
  • 4 oz Tomato juice
  • 2 dashes Tabasco Sauce
  • 2 tsp Prepared horseradish
  • 2 dashes Worcestershire sauce
  • 1 pinch Celery salt
  • 1 pinch Smoked paprika
  • 1 pinch Ground black pepper
  • radishes and jalapeño slices for garnish

In a cocktail shaker, mix lemon juice, vodka, tomato juice, tabasco, horseradish, worcestershire, celery salt and paprika. Stir and pour in a glass over ice. Grind fresh black pepper on the top.

For garnish, peel the radishes so that they look like eyeballs. Carve a hole in the radish and stick a jalapeño slice in the hole. Skewer with a toothpick or skewer to keep the jalapeño in place. Put in glass and enjoy the creepy garnish.

Photographs by Jessica Yager

October 21, 2013
by katie
1,070 Comments

Mummified Pigs in a Blanket with “Blood” Sauce

I can’t believe how close we are to Halloween! Especially since I haven’t really started on my costume. Then again, I haven’t made plans for any event that needs a costume yet, but one thing at a time.

Starting with these mummified pigs in a blanket. I had so much fun working on these Halloween posts. Generally speaking, you don’t want to find your food a little disturbing, but that is the fun of Halloween! Treats that look like bones, bugs, and blood are all the rage. I was inspired to make this little treat from something I saw on Pinterest (shocking, I know). They are so darn yummy, they didn’t even make it until the end of the photo shoot. _MG_3631I love how the mustard eyes kind of glow.

This was a very easy to put together treat that would surely be a hit at any Halloween party. I mean, who doesn’t like pigs in a blanket? And why make normal pigs in a blanket when you can make these super spooky ones? Serve it up with some tangy ketchup, “blood” sauce, and you’re in the spirit of the holiday!_MG_3661What happened to that one mummy’s head!?

I totally ate it.

Mummified Pigs in a Blanket with Bloody Dipping Sauce

  • 1 package breakfast sausage links
  • 1 sheet of frozen puff pastry, defrosted
  • yellow mustard
  • 3/4 cup ketchup
  • 1 TB prepared horseradish

Preheat oven to 400. Heat a skillet over medium heat and cook breakfast sausages until browned and cooked through. Set aside to cool.

Roll out your puff pastry dough on a floured surface until it is nice and thin. Should increase in size by about a third. Using a sharp knife, cut 1/4 inch strips of pastry. Wrap the pastry strips around the sausages to create a mummy effect. Leave a small area uncovered for the “face”. Place on a baking sheet. When you have assembled all the mummies, bake for 20 minutes, or until pastry is golden.

While the sausages are cooking in the oven, mix the ketchup and the horseradish for a dipping sauce. Set next to your platter for serving. When the sausages cool, draw on the eyes with the yellow mustard.

_MG_3642Serve, eat, and enjoy! These treats are going to go fast.

Happy Halloween!

Photographs by Jessica Yager