Katie Stew

A rich, simmering blend of my favorite things

October 4, 2011
by katie
1,041 Comments

Southern Comfort Evening

Hey Ya’ll!
Inspired by my recent visit to Savannah, and eating at Paula Deen’s restaurant, I’ve been craving a down home, Southern dinner. This weekend I satisfied this craving with a dinner of Collard Greens, Meatloaf, and baked sweet potatoes. This was followed by the blackberry cobbler recipe that I’ve already shared.
Ya’ll are going to love this.
Not only was this dinner delicious, it was actually pretty easy. Although everything has a long cook time, the prep times were pretty minimal. I was able to get everything in the oven, and sit down and watch some tv before buzzers started going off. First, I tossed the sweet potatoes in the oven while it was preheating for the meatloaf. Then I started the greens cooking, covered them, and made the meatloaf. I added that to the oven with the sweet potatoes, and then made the cobbler and tossed that in the oven too! It was perfect for a Sunday night, although you could make this meatloaf on any night of the week. It makes great leftover sandwiches.

I didn’t take pictures because A. meatloaf and greens are hardly the prettiest foods around and B. I was too busy eating to bother!

Now, I’d never made greens before, but have recently decided I like them. I found a recipe for collard greens on Allrecipes.com that seemed simple enough (and it had bacon, so it had to be yummy). This is generally the recipe I found except that I added the jalepeno. I figured if it was called kickin’, it really should be! So be warned, ya’ll. It’s spicy. But that’s just how I like it.
This is going to become a staple in my winter diet.

Kickin’ Collard Greens

Ingredients:
1 tablespoon olive oil
3 slices bacon, diced
1/2 large onion, chopped
1 jalepeno, diced
2 cloves garlic, minced
1 teaspoon salt
1 teaspoon pepper
3 cups chicken broth
1 pinch red pepper flakes
1 large bunch fresh collard greens, cut into 2-inch pieces

Directions:
1. Heat oil in a large pot over medium-high heat. Add bacon, onion, and jalepeno and cook until tender, about 5 minutes. Add garlic, and cook until just fragrant. Add collard greens, and fry until they start to wilt.
2. Pour in chicken broth, and season with salt, pepper, and red pepper flakes. Reduce heat to low, cover, and simmer for 45 minutes, or until greens are tender.

I made a few meatloafs last year. At first, I wasn’t thrilled, but I think I’ve come to realize that there is virtue in simplicity when it comes to meatloaf. I learned this when I went home for a visit and my dad had made a meatloaf. It was delicious! I asked, what’s in it? What’s your secret? He told me there was nothing in it but a french onion soup seasoning packet. It was so good!

So, I don’t add onions or peppers or anything that I’m not sure that I’m going to like. In fact, the reason I added the chives and parsley is because that is what I happened to have in my garden and they sounded good. Those are not ingredients to make or break this dish. So make it anyways, even if you don’t have fresh herbs on hand. Just throw in a few of your trusted seasonings and I’m sure it would work out. This is supposed to be easy!

No Trouble Meatloaf

For the meatloaf:
1 pound ground beef
1 egg
1 cup breadcrumbs*
3/4 cup milk or buttermilk
1 tablespoon Worcheshire sauce
1 tsp salt
1 tsp pepper
pinch of red pepper flakes
1 tablespoon fresh chopped chives
1 tsp fresh chopped parsley

For sauce:
1/3 cup ketchup
2 TB mustard
1 TB brown sugar

Preheat the oven to 350.
Mix the all the sauce ingredients in a small bowl. Set aside.

Mix all ingredients for the meatloaf, except for the beef, into a large bowl. Then add the meat, folding into the mixture gently with your hands. Be careful to not overwork this, or your meatloaf will be dense.

Add loaf to a buttered loaf pan. Pour sauce over the top. Bake for 50 minutes. Let set for 10 minutes before cutting.

* If you don’t have breadcrumbs, toast 2 slices of sandwich bread. Then, either chop very small, or put in a food processor until in small pieces. Then procede as normal.

Enjoy!

October 3, 2011
by katie
1,255 Comments

Fall Bounty= Blackberry Cobbler

The weather has been gloomy here. Fall has arrived. I’ve been trying to psych myself up about it, with little sucess. That is until I went to the farmer’s market yesterday morning. There was such a bounty of beautiful produce to search through on my crisp Sunday morning. Suddenly I started to get excited again.

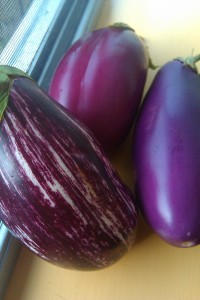
And I was facinated by the sheer variety of eggplants! I picked these up because they were just too pretty to not get.

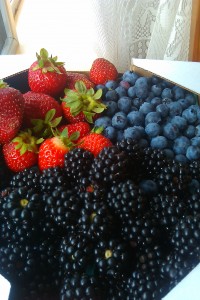
Not to mention these beautiful berries. Needless to say, I was feeling pretty satisfied when I got home yesterday.

Yes. Locally Grown Berries indeed.

So, while I don’t yet have a plan for my beautiful eggplants and various squashes, I did do something last night with the berries.

I searched online for Berry cobblers and the first one that came up was from Betty Crocker. More than just that, the description said, “A recipe with soul, this cobbler won the grand prize in the “Betty Crocker Recipes from the Soul” recipe contest!”
I love that Betty Crocker has a soul cooking contest.

Obviously this was the recipe I had to make with all those blackberries I had discovered on my Sunday market quest. And let me tell you, yum. Really easy, fast, and yum. I would have taken a picture, but I was too busy eating.

Betty Crocker’s Blackberry Cobbler

Ingredients:
2 1/2 cups fresh or frozen (thawed and drained) blackberries (do not use blueberries)
1 cup sugar
1 cup Gold Medal® all-purpose flour
2 teaspoons baking powder
1/2 teaspoon salt
1 cup milk
1/2 cup butter,
Ice cream for serving!

1 In medium bowl, stir together blackberries and sugar. Let stand about 20 minutes or until fruit syrup forms. Heat oven to 375°F.

2 In large bowl, stir together flour, baking powder, salt and milk. Stir in melted butter until blended. Spread in ungreased 8-inch square pan. Spoon blackberry mixture over batter.

3 Bake 45 to 55 minutes or until dough rises and is golden. Serve warm with cream.

September 27, 2011
by katie
1,178 Comments

Birthday month

I can’t believe I haven’t written a thing in September. But you know what? It is my birthday month. So, I decided to take some time off. Besides, the past few weeks have been filled with takeout, dining out, and travel. I’ve been a busy bee.

But, my friends, I am happy to say that I’m about to get back on the horse. I was speaking with a friend earlier today and though I am saddened by the end of our short, stunted, Seattle summer, I have to say that I’m starting to look forward to fall. I’m looking forward to making big pots of soup, casseroles, and things that slow cook for hours, making my house smell like heaven. In fact, I began my journey again this weekend by making a pot of my favorite turkey white bean chili. I was also making another round of Dr. Pepper pork butt on Saturday when some friends stopped by for a surprise visit and card game in my backyard. When we were sitting out there playing, someone said that it smelled like honeysuckle and barbeque out there.

I said that it was my natural scent.

I wish. Who would need Chanel when you could smell like honeysuckle and bbq?

Soon posts will start flowing again. I’m about to get back into the kitchen and I’ve got some new recipes I can’t wait to make.

Warning: I just got a new Paula Dean cookbook on my recent trip to Savannah. Be prepared for butter. Lots of butter.

August 16, 2011
by katie
644 Comments

Beach Music

This morning I finished Beach Music, another book that has served to solidify my deep love of Pat Conroy.

The book was fabulous. Completely and utterly fabulous. It is a whopping 768 pages long, prompting one fellow coffee shop patron to ask me if it was helpful in my workouts, as I was lifting the gargantuan thing out of my bag. But it was completely worth it. So many stories, beautifully told.

The thing about Pat Conroy it seems, is that he has a gift for telling stories that are moving, beautiful, and wondrous, and also stories that are deeply disturbing. This book was a roller coaster ride that had tears of joy as well as sadness and horror. It was not an easy book, but many wonderful books are not.

The story follows Jack McCall, a foodie and travel writer from South Carolina. After the tragic suicide of his wife, he moves with his young daughter to Rome, swearing to never return to his birthplace or speak with his family or the family of his wife ever again. He is eventually driven home after hearing of his mother’s devastating cancer. Upon returning, he is confronted with his past, his decisions, and the stories that led to his self created exile.

This book covers the mental illness of his wife, her family’s history with the Holocaust, and how that contributed to her mental state. It covered the story of his mother and her tragic upbringing in the Carolina mountains. It covers his childhood friendships and how the Vietnam war tore them all apart. It explains the art of dying well and what it is like to lose a parent. There is even an epic tale of being lost at sea. It covers love and loss, murder and marriage, justice and forgiveness.

Each and every page of this insanely long novel was lovely. His writing is beautiful and the characters are complex. In his stories, even the best intentioned people can do terrible things to each other and everyone’s actions have consequences more far reaching than anyone could have known.

As I said before, this is not an easy book. I don’t mean in technical terms. His writing is fluid and enjoyable, very engaging. I mean that it is hard in terms of content. There is a lot of violence and some tales from the Holocaust that can crush your soul. But those dark depths are balanced with stories of great food and family and water skiing in the sun.

Take this roller coaster ride. You’ll meet friends. You’ll choose enemies. And maybe by the time the story is over, all those people will have switched. But either way, these characters will stay with you.

I’m very glad I read this book.

August 12, 2011
by katie
1,116 Comments

Banana Bread

I am tired of throwing away bananas.

I usually get a few bananas in with my weekly produce box that comes to my house. Often we eat them. Just as often I end up throwing them away because they’ve gone brown, waiting for me to finish all my other fabulous summer produce. I decided yesterday that I was tired of throwing them away and that I would make banana bread instead.

Now, this is really a rather revolutionary idea for me. I don’t really like bananas. I know, that is a crazy thing to say, but it is true. I like bananas when they are still a little green and don’t taste very banana like. When I was a kid (and even now), banana flavored candy was always my least favorite. There isn’t much that is grosser to me than artificial banana flavoring.

However, I’ve had a few banana breads over the years that I’ve liked. One time, Phylicia Rashad offered me a piece of banana bread, and even though I wasn’t a big fan, how can you say no to Mrs. Huxtable!? More recently, a friend of mine brought me a piece that had carrots in it, and I quite liked it. So, when searching for a recipe to use my sad bananas for, I chose one with carrots.

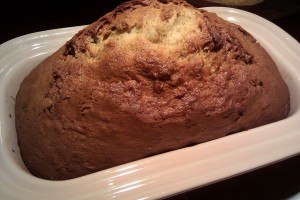
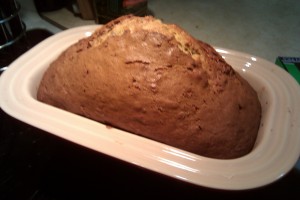
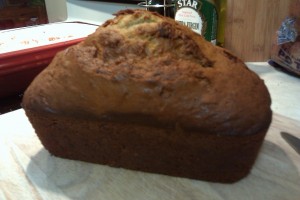
This is the beautiful loaf that I ended up with.

Smelled even better than this looks.

I found this on Allrecipes.com and the only change I made was using walnuts instead of pecans. I ended up cooking it for the full length recommended, and if anything, I overcooked it a bit. I don’t think you should wait quite until a toothpick in the middle comes out clean. Maybe a toothpick 1/3 of the way from the edge. But, I was the only one who thought it was a little dry, so maybe it was just perfect.

I like that this banana bread was a) not too banana-y and b) not too sweet. It is simple and rich and lovely. Not to mention, I had it in the oven and everything cleaned up in about 20 minutes.

Carrot Banana Bread

Ingredients

  • 1/3 cup vegetable oil
  • 1 cup sugar
  • 2 eggs
  • 2 cups all-purpose flour
  • 1 teaspoon baking soda
  • 1/2 teaspoon salt
  • 1/2 teaspoon ground cinnamon
  • 1 cup mashed ripe bananas
  • 1 cup grated carrots
  • 1/2 cup chopped walnuts

Directions

  1. In a mixing bowl, combine oil and sugar. Add eggs; mix well. Combine flour, baking soda, salt and cinnamon; gradually add to the creamed mixture alternately with bananas. Stir in carrots and pecans. Transfer to a greased 9-in. x 5-in. x 3-in. loaf pan. Bake at 350 degrees F for 55-65 minutes or until a toothpick inserted near the center comes out clean. Cool for 10 minutes before removing from pan to a wire rack to cool completely.

August 11, 2011
by katie
1,237 Comments

Glassybaby Paintings

Over the last few years, I’ve gathered a collection of glassybabies. What is a glassybaby? It is a candleholder/vase/cup/whatever you want to use it for. They are made by a local company and you see them all over Seattle in hotels, restaurants, and homes. I’ve gained my collection through PopCap. They are often given away for recognition of good work, holidays such as birthdays, or team outings.

The head of my department is a big fan because of the glassybaby backstory. They were originally created by a woman struggling with cancer, who enjoyed the hope and light the candleholders gave. The company donates part of their procedes to charities supporting those struggling with cancer and other worthy organizations.

I now have 6 of these beautiful things and found some inspiration last week to paint them. I started out with a blue one that I love.

and then moved on to the green…

And then I ended with my favorite one, which is called “creamsicle”.

When I set them all up together, I have a painted collection to go with my glass collection! I think I’ll find a cute little triptych frame to display them all.

I’m pretty happy with how they turned out. It took awhile, but I think that I was able to capture the way that they glow and radiate warmth.

I like how they all turned out a little different in size and style. It works. Each glassybaby is handmade and different from all the others. If you would like to learn more about glassybabies or get some for yourself, check out their website. http://www.glassybaby.com/

Maybe they can add a little light and hope to your home too.

August 1, 2011
by katie
1,083 Comments

To Kill a Mockingbird

I have read “To Kill a Mockingbird” before. I read it backstage when I was working at the Arkansas Repertory Theater during a production of “Of Mice and Men”. I remember liking the book, but it didn’t really stick with me. I didn’t really see what the big deal was about. So with summer here, I thought it would be a fun, classic reread.

And honestly, I get it this time. I see why it is considered one of the greatest works of American Literature. It isn’t a flashy book filled with lots of allegory or alliteration. It is simple and beautiful and full of life lessons.

I’m really bad about running through books. I read them at lightening speed, trying to get to the end and find out what happens. But “To Kill a Mockingbird” is not a book for the speed reader. It is one that you wade through slowly, cherishing each bit of fatherly advice that Atticus gives you.

“Before I can live with other folks I’ve got to live with myself. The one thing that doesn’t abide by majority rule is a person’s conscience.”

I loved that quote. Atticus is such a fabulous character. He is the same in the street as he is in his home. He is trustworthy, honest, and dedicated to doing what is right, no matter what the consequences. No matter who is watching.

At another point he says this:

“I wanted you to see what real courage is, instead of getting the idea that courage is a man with a gun in his hand.  It’s when you know you’re licked before you begin but you begin anyway and you see it through no matter what.  You rarely win, but sometimes you do.” 

Atticus is a study of real character, of courage of a different kind. He took a case that he knew would be controversial, a case that he knew he probably wouldn’t win, and he did it because it was the right thing to do. He stood down a mob and even his friends because his conviction to do the right thing was unbreakable.

I believe that the main theme of the book is that it is important to be good to those who are less fortunate than you. I think that the story is going beyond the golden rule of treating others how you would like to be treated. The real sin is being cruel to those who are weaker, poorer, and generally less fortunate. This theme is played out through their discussion of mockingbirds and the way it ties the ending together is brilliant.

“‘Remember it’s a sin to kill a mockingbird.’ That was the only time I ever heard Atticus say it was a sin to do something, and I asked Miss Maudie about it… Mockingbirds don’t do one thing but make music for us to enjoy… but sing their hearts out for us. That’s why it’s a sin to kill a mockingbird.”

Harper Lee made the main character Scout, a 7 year old girl. Through Scout’s eyes, she is able to cover issues such as racial prejudice in the South, politics, poverty, and evil, with honesty and openness. Being a child, Scout can ask questions that are taboo, and bring about honest discussion.

It is a fabulous tale of growing up, the perils of learning right from wrong, adventure, and the hard lesson that life isn’t always fair.

If you’ve read this book before and didn’t love it, maybe you just weren’t ready for it. Give it another try. You might learn something about yourself.

July 25, 2011
by katie
965 Comments

Spicy Dr. Pepper Shredded Pork

This weekend I made pulled pork. I had never done it before, but I saw a recipe for “Spicy Dr. Pepper Shredded Pork” on the Pioneer Woman’s blog that looked so simple, so easy and delicious, that I just had to try it out.

So, Saturday I went to the grocery store, got my supplies and tossed this thing together in the early afternoon. Then I sat back, watched movies, and enjoyed my house slowly filling up with beautiful scents of spice and sweetness and pork.

MMmmmm. Pork.

I didn’t take any pictures of this endeavor, as the pictures on the Pioneer Woman’s blog of this process are so killer. You have to check them out. http://thepioneerwoman.com/cooking/2011/03/spicy-dr-pepper-shredded-pork/

Not only was this recipe simple, it is delicious. I have so much pulled pork now, it is hard to know what to do with it! We’ve had pulled pork bbq sandwiches and quesadillas so far and I see nachos peeking over the horizon. The pulled pork you create here is a solid base for whatever you want! Toss it in a taco for mexican food or throw some bbq sauce on there for some more down south yumminess.

I followed this recipe spot on with two exceptions. 1. I had a 4 pound pork butt, so I only cooked it for 5 hours and 15 minutes. 2. After I pulled the pork out and shredded it, I took all the leftover sauce, chilis, and onions and I blended them into a single consistency sauce and I only added half of it back into the meat. Just enough to get it wet, not enough to drown it. I would recommend this method.

I have been at a loss to find great bbq in Seattle and I’ve missed pulled pork. With a recipe this easy, there is no excuse for anyone to have bad pulled pork again. Make your own. You’re going to love it.

Recipe: Spicy Dr. Pepper Shredded Pork

 |   |   |   


Ingredients
  • 1 whole Large Onion
  • 1 whole Pork Shoulder (“pork Butt”) – 5 To 7 Pounds
  • Salt And Freshly Ground Black Pepper
  • 1 can (11 Ounce) Chipotle Peppers In Adobo Sauce
  • 2 cans Dr. Pepper
  • 2 Tablespoons Brown Sugar

Preparation Instructions

Preheat oven to 300 degrees.

Peel the onion and cut it into wedges. Lay them in the bottom of a large dutch oven. 

Generously salt and pepper the pork roast, then set it on top of the onions in the pan. 

Pour the can of chipotle peppers over the pork (include the sauce.) Pour in both cans of Dr Pepper. Add brown sugar to the juice and stir in. 

Place lid tightly on pot, then set pot in the oven. Cook for at least six hours, turning roast two or three times during the cooking process. Check meat after six hours; it should be absolutely falling apart (use two forks to test.) If it’s not falling apart, return to the oven for another hour. 

Remove meat from pot and place on a cutting board or other work surface. Use two forks to shred meat, discarding large pieces of fat. Strain as much of the fat off the top of the cooking liquid as you can and discard it. Return the shredded meat to the cooking liquid, and keep warm until ready to serve. (You can also refrigerate the meat and liquid separately, then remove hardened fat once it’s cold. Then heat up the liquid on the stovetop and return the meat to the liquid to warm up.)  

Serve on warm flour tortillas. Top with shredded lettuce, diced tomatoes, grated cheese, avocado slices, salsa, and whatever else you’d like. Or, pour on some BBQ sauce and serve on a bun.

However you eat it, enjoy!

July 22, 2011
by katie
1,170 Comments

Cheese Dip

I am constantly amused by the obsession that my friends have formed over my cheese dip. It doesn’t seem to matter how long I cook for a party, what fancy things I prepare. My friends look around and ask, “Where’s your cheese dip?”

Yes. I make cheese dip for many events. There is nothing complicated about this cheese dip, and yet people hover over it. They gorge themselves on it and they never make it for themselves. You know why? Because no one in this part of the world is ballsy enough to buy Velveeta. In Seattle, we are too health conscious. Too serious to buy fake cheese. We buy organic. We buy healthy. And we go to our friend’s houses for cheese dip.

It is one of those ultimate guilty pleasure foods.

I like being the one that brings this trashy/delicious thing to their attention. Without me, these Northwesterners would never get to see the gloriousness that is fake cheese.

It is hard for me to even list this as a recipe, as there is so little to it. But people ask me for it, and who am I to deny anyone this indulgence? I have dressed this recipe up and down, but I have to tell you, the most basic method here is always the most loved. When I add new things, people miss the original. So here you go.

Everyone Loves Cheese Dip:

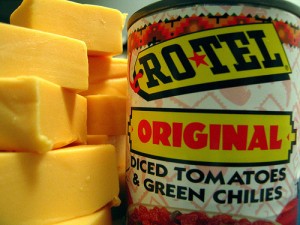
8 oz Velveeta Cheese (one small package or half a large package)

1 can Rotel

1 pound ground beef

Brown the beef in a skillet. Drain. Add can of Rotel and mix. Add the Velveeta cheese, cubed. Melt until there are no more cheese chunks. Pour into heat safe container and serve with tortilla chips.

Eat in droves. Will disappear in minutes. You’ll be amazed.

July 14, 2011
by katie
1,136 Comments

Memphis Style BBQ Sauce

As part of the 4th of July extravaganza, my beau and I also decided to try something new and make our own barbecue sauce. Now, bbq sauce is a much debated and controversial subject. Depending on where you are from it is hot and vinegary, sweet and thick, spicy and tomato-y, or maybe it is just from a bottle. But wherever you are from, you tend to have your own idea of what a good bbq sauce tastes like.

Being from Arkansas, I’ve always felt I had the best of all worlds. The sauces tended to be a nice combo of the spice of Texas and the sweet of Memphis. They were almost always spicy, with an excellent tang and lasting flavor on the palette.

I’ve visited Memphis on a number of occasions and always love the bbq there. There is a famous rib joint there called the Rendevous, that serves some of the best ribs I’ve ever had, after my daddy’s of course. So when we were looking for the perfect recipe to put on our own ribs for the 4th of July, we settled on a recipe for a Memphis-style sauce from my cookbook, “Barbecue! Bible : Sauces, Rubs, and Marinades, Bastes, Butters, and Glazes”.

Probably the most significant reason we chose this particular recipe is because it is from John Willingham, “a legend on the American barbecue circuit: He’s a winner of dozens of grand championships, at the Memphis in May, Kansas City Royal, and Jack Daniel’s Invitational barbecue competitions.” And my favorite part about the article preceding the recipe was this: “his sauce… contains something for everyone: tomato sauce, steak sauce, mustard, even Coca-Cola. (“I figure with this many ingredients, everybody’s bound to like something,” Willingham quips.)”

How amusing is that? I also figured with all the ingredients, everyone was bound to like something about it. And it was yummy. It wasn’t the perfect sauce of my childhood, but it had a great lasting flavor and a serious tang to it. It tasted better the second day. I recommend you give it a try to get some fun flavors of the South.

Memphis Style Barbecue Sauce

Yield : Makes 4 cups

Ingredients

WET FIXIN’S

  • 4 cups tomato sauce
  • 1 cup cider vinegar
  • 1 cup Coca Cola, or other cola
  • ¼ cup steak sauce (such as A1)
  • ¼ cup yellow mustard
  • ¼ cup fresh lemon Juice
  • 3 tablespoons molasses
  • 3 tablespoons soy sauce
  • 3 tablespoons Worcestershire sauce
  • 1 teaspoon Tabasco sauce
  • ½ teaspoon liquid smoke

DRY FIXIN’S

  • ½ cup (packed) dark brown sugar
  • 1 to 2 tablespoons Basic Barbecue Rub (John uses a rub he manufactures called “W’ham”, I used a Corky’s rub)
  • 1 tablespoon pure chili powder (not a blend)
  • 1 tablespoon freshly ground black pepper
  • 1 tablespoon mustard powder
  • 2 teaspoons garlic salt

Directions

1. Combine all the wet fixin’s in a large, heavy, nonreactive saucepan and slowly bring to a boil, uncovered, over medium heat.

2. Meanwhile, combine the dry fixin’s in a bowl and mix with your fingers.

3. Reduce the heat and stir the dry fixin’s into the sauce mixture. Gently simmer the sauce until thick, concentrated, and richly flavored, about 30 minutes. Use right away or transfer to jars, cover, cool to room temperature, and refrigerate. The sauce will keep for several weeks.