Katie Stew

A rich, simmering blend of my favorite things

August 16, 2012
by katie
2 Comments

Awesome Pasta

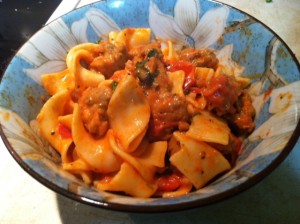
Technically, this recipe should probably be called something like, “Spicy Tomato-Cream Sauce with Italian Sausage and Egg Noodles”. However, a few years back when this was a regular favorite, I didn’t bother to give it a name and it became generally known as “that awesome pasta”. Now I just call it Awesome Pasta, and my boyfriend and I know what we’re talking about.

And it really is awesome.
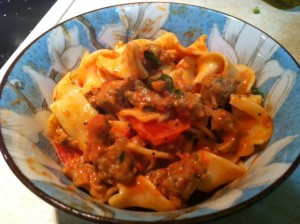
And easy. And cheap. And delicious. All the things that make a recipe become a staple in a household. I’m not sure why, but it has been a very long time since I made this.

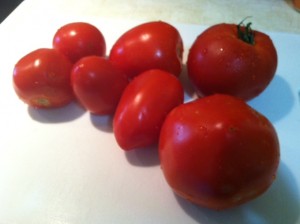
There were so many delicious tomatoes at the market this weekend that I thought back to this old favorite and decided it was time to dive back in. In fact, it is a little shocking that I’ve never put this recipe up here considering how often I used to make it.

Awesome Pasta

aka Spicy Tomato-Cream Sauce with Italian Sausage and Egg Noodles

Ingredients

A bunch of tomatoes, chopped (No definitive number. I used 7 here. In the past I’ve used more or less. About 3 cups is ideal.

1 TB garlic, chopped

1 tsp red pepper flakes

olive oil

1 pound spicy italian pork sausage, casings removed

1/2-3/4 pound egg noodles

2-3 oz cream

1-2 TB fresh basil, julianned

salt and pepper

Directions

First up, put water on to boil.

Drizzle some olive oil in your pan and add garlic and red pepper flakes. Saute until fragrant. Then add the sausage and cook until browned.

Drain the meat and add the tomatoes.
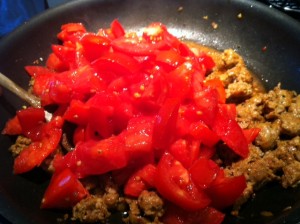
Mix and turn heat to simmer. Add some salt and pepper. Let mixture cook about 10 minutes, or until the tomatoes have become sauce. Stir occasionally and crush the tomatoes with the back of your spoon. You’ll end up with this.

Yummy.

While that is doing it’s thing, cook and drain the noodles.

Back to the sauce. When the tomatoes have cooked down, add in the cream and stir to combine. Turn off the heat, or keep warm if your noodles are still cooking. When the noodles are ready, toss the basil in the sauce and combine the sauce with the noodles.

Let sit for a few minutes to allow the noodles to soak up the sauce. They will become nice and glazed.

Add salt and pepper to taste if necessary and enjoy.

You really will.

August 15, 2012
by katie
175 Comments

Sunflowers

The last few weeks, I’ve been blown away by the summer flowers at the Farmer’s Market.

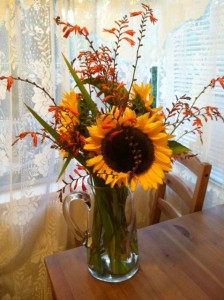
There has been a profusion of sunflowers. They are gigantic and beautiful.

Each week they are a bit more extravagant. Bursts of yellow as big as your head.

I think these might be trying to eat me. Sunflowers have never been my favorite. I buy them often because they are the favorite of my boyfriend. But lately, I think I get it. They look like summer. They look like happy. It is amazing what a difference a bunch of bright fresh flowers can bring to a room and bring to a mood.

Hope you enoy.

Just wanted to share the sun.

August 10, 2012
by katie
1 Comment

Corn Casserole

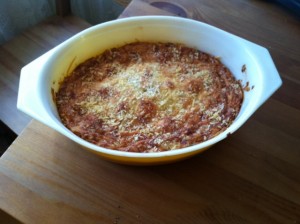
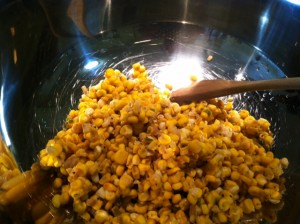
This summer, I’ve been craving the food of the South. I’ve been looking for comfort foods, full of summer vegetables and love. I had some leftover sauteed corn from a bbq I went to last weekend, and decided to use it to make a corn casserole. You can’t get much more comforting than this.

It is so good, I’ve been eating it for lunch most every day this week. It is slightly sweet, cheesy, and just bursting with flavor from the fresh summer corn. This is a great staple dish for dinner parties, potlucks, or bbqs that will take you through the fall. I’ve made this at Easter, in the summer, and at Thanksgiving.

When I asked my mom for this recipe, she replied with this addendum attached: “I have used fresh corn and a bit of cream; I’ve used multiple peppers; or different cheeses. But the one below is tried and true.”

And trust me. It is.

When I made it this last time, much like my mom I shook things up. Like I said, I had some leftover corn that I had cooked with butter and peppers. So instead of the two cans of corn in the recipe, I used two cups of fresh corn.

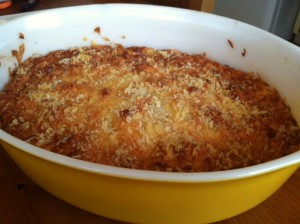
I also used sharp cheddar on top, since that is what I had in the house, and panko instead of breadcrumbs, but other than that, the rest was on target. Find your own variations, but the corn, cheese, chilies and Bisquick combo is a winner. Fast and easy to assemble. Delicious.

Naomi Hatley’s Corn Casserole

1 small can drained niblett corn (can use mexicorn if you like)

1 large can creamed corn

1 can chopped green chilies

1 cup Bisquick

1 beaten egg

1 stick melted butter

½ cup milk

Sliced Monterrey Jack cheese  (with or without peppers)

Browned bread crumbs (use real bread)

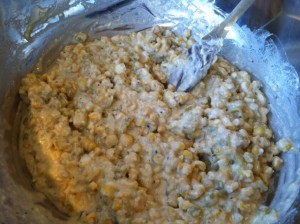
Melt butter reserving about 1/3 to brown bread crumbs in. Mix all together except cheese, breadcrumbs and reserved butter.

Put in buttered baking dish. Brown breadcrumbs in butter in a skillet. Put cheese on top in the baking dish, then the bread crumbs. Bake at 350 for 1 hour.

Voila. Deliciousness. Happy summer.

August 9, 2012
by katie
1,067 Comments

Stuffed Patty Pan Squash

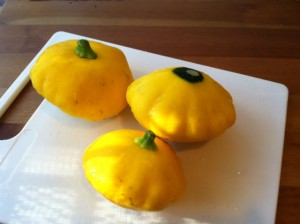
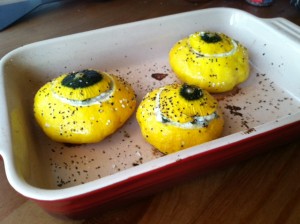
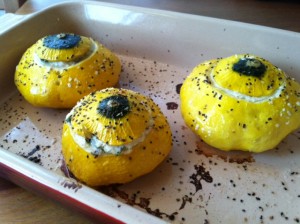
The farmer’s market was such a wonder to me this week. There was such a huge variety of beautiful summer produce, that it was near impossible to choose. But, one of the things that always calls to me are the adorable little patty pan squash that fill the stalls this time of year. There was so much squash and zucchini, I couldn’t say no.

I mean really, how could you say no to this?

So adorable!

Sure, you can chop them up and eat them a million different ways, but I like to embrace thier cute little shapes and make perfect single serving dishes out of each one. I like to stuff them with yummy things and bake them until glorious.

Yummy!

I’m going to walk you through how I made these, but please, stuff them with whatever sounds yummy to you. These are filled with cream cheese, bacon, and basil. Boy were they good!

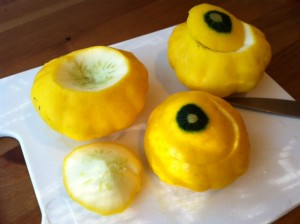
Step one, take a small slice off the bottoms so that they’ll sit flat.

Step two, cut off the tops at an angle (like carving a pumpkin). Like this picture below. (Now, I actually am doing these squash upside down. I cut off the tops for the flat side and used the bottom for the lids because I thought it was prettier. I’m telling you this so that you aren’t all like, she doesn’t know which end is the top!)

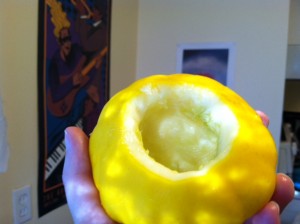
Once you have the lids cut off, scoop out the seedy inside bit, so you have a nice little squash bowl like this. I found that a grapefruit spoon is perfect for this task.

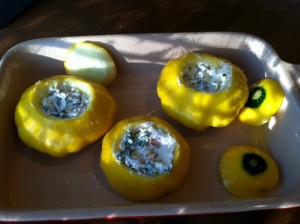
I then created the filling. I took about 3 tablespoons of cream cheese, chopped up two slices of cooked bacon, chopped about 1 tablespoon of basil, and mixed it all up together with a dash of lemon pepper.

Then rub the squash all over, inside and out with a little bit of olive oil. Now it is time to stuff the mixture into each squash!

Once you have that done, put the lids on and sprinkle all over with a little salt and pepper. Stick in an oven at 350 degrees for about 50 minutes. Generally, I would cook at 400 for about 30 minutes, but I had something else going in the oven at the same time. Either way, cook the squash until it softens and the cheese is nice and bubbly.

Serve each person their own adorable little squash. It can be your main item or a side dish. This is a tasty and easy way to use these adorable summer vegetables.

And hey, it certainly doesn’t hurt that the vegetables are filled with cheese and bacon.

Enjoy!

August 1, 2012
by katie
946 Comments

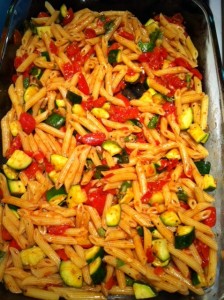
Pennette Pasta with Summer Vegetables

I was a crankypants yesterday. I hadn’t slept well, my day was long and frustrating, and so I was less than charming by the time I got home. When I went to make dinner, I needed something that tasted like summer. Something easy that would brighten my day and I found it.

I made up this recipe based off of a raw tomato pasta sauce that I saw in Bon Appetit this month. Check it out if you are interested. I had a ton of cherry tomatoes in the house and two zucchini and decided to make something awesome. I was thrilled that it was a success.

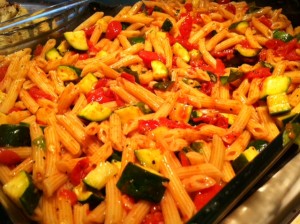
Yum!

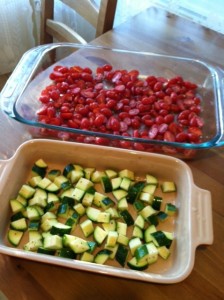
I wanted to make a cooked sauce out of the tomatoes, but instead of simmering on the stove top, I decided to roast a sauce out of them. So I seasoned them up and put them in a pan to roast. I roasted the zucchini separately. They looked so pretty in the pans.

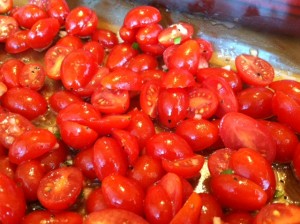
These fresh tomatoes were so delicious. I could have just eaten them up as is.

And trust me, I did with many of them.

But, roasting this sauce made it so sweet and delicious. Full of juices that soaked in to the pasta. I will definitely be making this recipe again. I just wish it hadn’t made my kitchen so hot! I certainly see why the original recipe was for a raw sauce.

Pennette Pasta with Summer Vegetables

1/2 pound pennette pasta, or mini penne
2 1/2 cups cherry tomatoes, sliced in half
1 large clove of garlic, minced
1 small jalapeno, or 1/2 large one, minced
2 zucchini, cut into small cubes
1 1/2 Tablespoons Balsamic Vinegar
1 1/2 Tablespoons Red Wine Vinegar
1/4 cup basil, torn
parmesan cheese
olive oil
salt and pepper
lemon pepper

Preheat oven to 400.

Mix tomatoes, garlic, and jalapeno in large oven pan. Drizzle with olive oil and season with salt and pepper.

In a second dish, toss zucchini with a drizzle of olive oil and season with some lemon pepper.
Put water on to boil.

When the oven is ready, put in tomato mixture and Zucchini mixture. Cook for 20 min.

Cook pasta in water to desired doneness. Try and coordinate everything to finish around the same time.

When tomato mixture is cooked and nicely bubbling, pull out and add the vinegars to the mixture. After that, add the hot pasta to the tomato sauce and toss with the fresh basil. Add Zucchini to the mix and sprinkle parmesan cheese on top.

Let the pan sit for about 10 minutes, mixing occasionally. This gives it time for the pasta to soak up all of the delicious juices from the tomatoes.

Voila! It will taste like heaven and cure even the crankiest of moods. It was like summer in my mouth and suddenly I had a smile on my face. Try it out if you find yourself with a surplus of tiny tomatoes.

July 30, 2012
by katie
1 Comment

Summer Cobbler

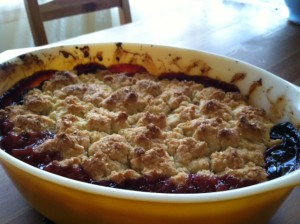
This past weekend my man and I hosted a BBQ for some friends. We had a great time and cooked a ton of fabulous food. One of my friends sent me this collage photo of the event and I love it.

That’s me at the top center working on the ribs. You can see the fabulous food spread as well as the absurd amount of tequila everyone brought. Apparently we were all in agreement about the need for margaritas. And did I mention food?

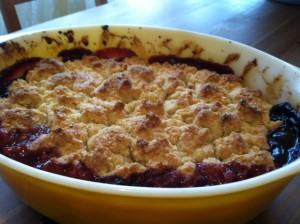
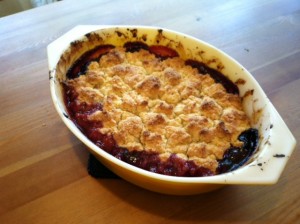
The other point of group agreement was a big thumbs up for the cobbler I made for the event. The next day one of the attendees even sent me a message saying she had dreamed of it and wanted the recipe. I think that makes it a win.

I found this cobbler in this month’s Bon Appetit. The original was just a blueberry cobbler, but I had an assortment of summer fruits and decided to use them all. Just blueberries would have been fine, but I loved the combo of the other berries and peaches. The crust was the real winner though. It was crumbly on top, light and fluffy inside. The perfect sweet biscuit topping and super easy to put together. I might make this topping into actual biscuits sometime soon for strawberry short cake. It would be perfect.

Throw this cobbler together for a great summer treat. Trust me, it will be gone nearly instantly when you let a crowd near it and they’ll thank you for it.

Summer Fruit Drop Biscuit Cobbler
(active time, 20 min. Cooking and cooling, 2 hours)

Ingredients

•1 1/2 cups plus 3 Tbsp. all-purpose flour
•3 tablespoons plus 1 cup sugar
•1 1/2 teaspoons baking powder
•1/2 teaspoon kosher salt
•6 tablespoons (3/4 stick) chilled unsalted butter, cut into 1/2″ pieces
•1/2 cup sour cream
•6 peaches, peeled and cut into cubes
•1 cup blueberries
•1 cup raspberries
•1 cup Blackberries
(The fruit amounts aren’t too exact. You should end up with about 6 cups of assembled fruit.)

Preparation

• Preheat oven to 375°. Whisk 1 1/2 cups flour, 3 Tbsp. sugar, baking powder, and salt in a large bowl. Add butter; using your fingertips, incorporate until only pea-size lumps remain. Gently mix in sour cream. Knead in bowl until a biscuit-like dough forms, 5–7 turns (overmixing will make dough tough).

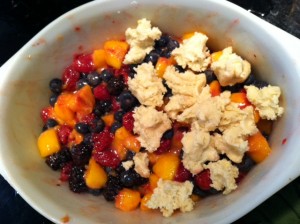
• Combine remaining 1 cup sugar, remaining 3 Tbsp. flour, and fruit in a large bowl. Toss to coat. Pour into an 8x8x2″ glass baking dish or divide among six 6-oz. ramekins. Tear biscuit topping into quarter-size crumbles; scatter over berries.

This is what the fruit looks like and this is with about 1/3 of the biscuit topping dropped on.

]

• Bake cobbler until juices are thick and bubbling and topping is cooked through and deep golden brown, 20–25 minutes for ramekins or 40–50 minutes for baking dish. Let cool for at least 1 hour.

Voila! Enjoy.

July 27, 2012
by katie
6 Comments

Antler Man

I finished a new painting last night. I started on it weeks ago and it has just been sitting in my craft room, half finished, looking sad. But I decided I needed to complete something last night and finished “Antler Man”.

I also decided to restart my regular craft nighting with the girls. I have not been doing much arts and crafts lately and it is time to turn it around. Hopefully, it will get me more productive and inspire more fun posting. So far, it is a lazy summer.

I can’t really explain why I enjoy artwork of animals in clothing so much, but I do and I bet you can expect to see more of it.

Have a lovely weekend.

July 11, 2012
by katie
1,080 Comments

Let’s Pretend this Never Happened: (A Mostly True Memoir)

I’ve been a busy bee the last few weeks with travel and work and haven’t had a chance to record all the fun books I’ve been reading.

About two weeks ago I read “Let’s Pretend This Never Happened: (A Mostly True Memoir)” by Jenny Lawson. It had me laughing so hard on the bus that people stopped and stared. I love when a book does that.

If you have not yet discovered “The Bloggess“,  you should do so. Jenny Lawson’s blog is hilarious and heartfelt. Many of the stories on the blog are incorporated into the book. So, first up, check out her blog and if it makes you snort your morning coffee out of your nose at work, then this book is for you. If you look at it and think that the horror stories from HR and her obsession with dressing taxidermied animals up in costumes isn’t hilarious, then you will probably start to wonder what is wrong with me and why I am recommending this book to people.

Consider that your warning.

Jenny tells the tale of growing up poor in rural Texas. Her father was a taxidermist and would bring home strange animals for pets and wake Jenny up in the night with puppets made from taxidermied road kill. It was a bizarre childhood to say the least. It follows her awkward teenage years and how she met her long suffering husband. There are stories so bizarre and funny that they are hard to believe, such as when she got her arm stuck in a cow’s vagina or had to ask two men at her office “Are these your penises?” after a photo got caught in the company’s spam folder.

The book also covers her crippling social anxiety and how it has affected her life. In the midst of all of the laugh riots in the book, there are some poignant moments about how sometimes she has to hide under a desk or embarrassing stories about how she’ll randomly bring up cannibalism at a dinner party and then will panic and be unable to stop talking about it until everyone walks away. The mix of emotions in the book make it more than just a silly party, but a look into the life of someone who is complicated, damaged, but still has a great sense of humor through it all.

This was a great summer read. I can see why it has been on the bestseller list for the last few weeks.

Besides, don’t you want to know the story of Beyonce the Giant Metal Chicken?

"Knock-knock, motherfucker"

Or experience some of the weird collection of taxidermy?

In case you were wondering, you can take taxidermied alligators on planes.

You know you want to read this book. Dive on into the crazy.

July 2, 2012
by katie
1,129 Comments

Spring Vegetables with Ravioli

I made a delightful dinner the other night that I want to share. It was fast, easy, and yummy. Nothing fancy about this dinner, but great for a quick weeknight meal.

As I showed you guys recently in a post, I’m growing spring peas this year. I had a bunch that were ready to harvest and came up with a really satisfying thing to do with them.

I picked these fresh out of my garden on Friday night. They were so vibrant.

I had the peas and found some asparagus in the fridge and decided to make some ravioli and enjoy my spring vegetables. I made a light, buttery sauce with the vegetables and tossed it all together.

Nothing complicated about this. Great way to enjoy some of those great spring vegetables. Adapt and taste to please.

Spring Vegetables with Ravioli 

Ingredients:

1 cup freshly shelled peas

1 bunch asparagus cut into 1 inch pieces

1/2 an onion chopped

2 cloves garlic

2 pieces bacon, chopped

lemon pepper

1 cup chicken stock

2 tb butter

1 tb basil

drizzle of olive oil

1 package cheese ravioli

salt and pepper to taste

Directions:

Put water on to boil.

In a large pan, drizzle some olive oil and add one TB butter. Over medium high heat, saute onions and bacon until bacon is cooked and onions are translucent. Add garlic and cook until fragrant. Add asparagus and cook until begins to soften.

At this point, you can occasionally pour in chicken stock when the pan starts to look a little dry. This will deglaze the pan and start forming a sauce.

Give the asparagus a generous shake of lemon pepper and a sprinkle of salt. Add the peas and the remaining butter and slowly add stock over the next few minutes, allowing it to thicken.

Toss ravioli in boiling water and cook according to instructions.

Cook the vegetable mixture over low heat until saucy and ravioli is done. Then toss the pasta with the vegetable mixture and let sit off the heat for a few minutes to let the flavor soak into the pasta.

Getting all saucy and settled in the pan.

Salt and pepper to taste, serve it up, and enjoy!

P.S. I don’t know if any of you have discovered these, but they now sell chicken broth in one cup packages. They are the best. Just the right amount for sauces and things. I’m terrible about buying big boxes of stock and broth and then only using a little and letting them go bad in the fridge. I love these little boxes. They come in a four pack.

So smart!

June 26, 2012
by katie
1,056 Comments

Drag Queen Zombie, the Creation Story

I consider myself very lucky to work for a very cool company. This year, was the first time that PopCap Games decided to be a sponsor at the Seattle Pride Parade. I was one of the many that worked to make this dream a reality. I was given the awesome task of creating a Drag Queen Zombie to be our mascot for our float in the parade. (And by given, I mean I took that job because I thought it would be awesome and that is one of the perks of leading the planning committee.)

When the time came to begin, I was given one of the zombie heads that we use for our promotional videos and events.


Plain old zombie.

When we decided to make a drag queen zombie for the parade, one of our talented artists here designed an awesome sticker to hand out to the crowds. I was able to use it as inspiration.

When I got the zombie home, we spent some time bonding and I decided that the first place to start, was obviously make up. A girl needs her face on before worrying about the rest. So I busted out the paints and glitter and got her on the way to beautiful. Isn’t she pretty?
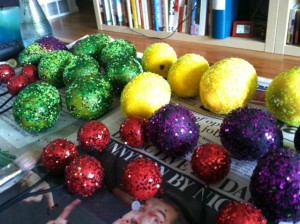
We had obviously decided to go with a Carmen Miranda theme for the zombie. One of my team members in the planning group found a bunch of fake fruit at a yard sale and hooked me up. I spent another afternoon glittering it dozens of pieces of fruit. We couldn’t have just plain fruit on the headdress!

Once I had the fruit and a bunch of sparkly supplies from a local craft store, I got to work. First, I built a foam platform to use as the foundation for the headdress, and to give the zombie extra height. I attached it to the zombie head and wrapped it all up in some glamorous fabric. Then I was able to attach everything to the foam, mostly via hot glue and wires. At this point in the process, I thought she looked pretty fabulous, but not quite perfect. I kept her home for about a week, trying to figure out the finishing touches.

Finally I came up with a game plan. She needed earrings. She needed feather eyelashes. And most importantly, the headdress needed to be bigger. Bigger is better when it comes to drag queen zombies.

And here is the final vision of lovely.

One of my partners in crime assembled the outfit to accompany the head, and here you can see her in full costume arriving at the float. (We had an excellent volunteer to portray the zombie. He was a real trooper.)

“Oh isn’t this all so exciting!”, she exclaims.

And here she is during the parade in full regalia.

When you put a 4 foot tall head on a 6 foot tall man, it makes for a giant of a drag queen zombie. The crowd was thrilled. I was thrilled. All in all, it was an awesome event and I love that I was able to use my crafty skills to create something this fun.

Not your every day craft project. 🙂