Katie Stew

A rich, simmering blend of my favorite things

June 20, 2013
by katie
1,093 Comments

White Chocolate Chip Macadamia Nut Cookies

My boyfriend loves white chocolate chip macadamia nut cookies. They are second only to snickerdoodles in his list of favorite cookies. Now personally, these tend to be near the bottom of my favorite cookie list. They are often too sweet and I wasn’t always a big fan of macadamia nuts. Then again, most of my exposure to white chocolate chip macadamia nut cookies has come from Subway. You know the cookies they always have by the checkout? He loves those. But anyways, my boyfriend has been enduring a huge project at work for the last month and I wanted to treat him to something special. 
IMG_1242
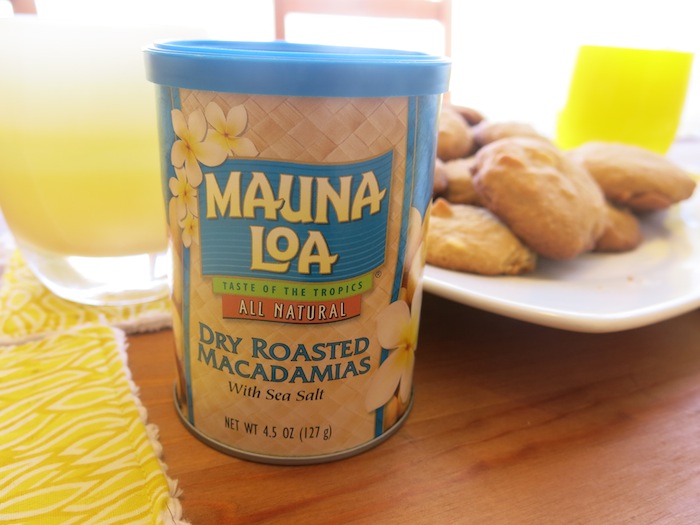
I was going through my cabinets and found this can of macadamia nuts that a friend had brought me back from Hawaii as a souvenir. I remembered André’s predilection for these cookies and thought it was the perfect time to whip up a batch. 
IMG_1252
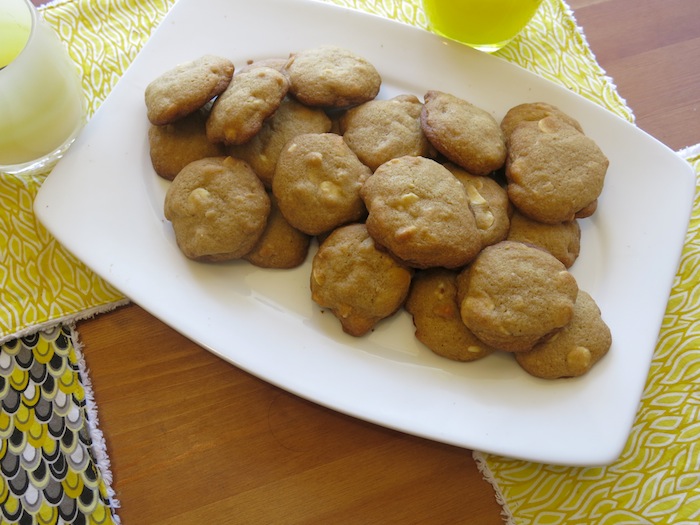
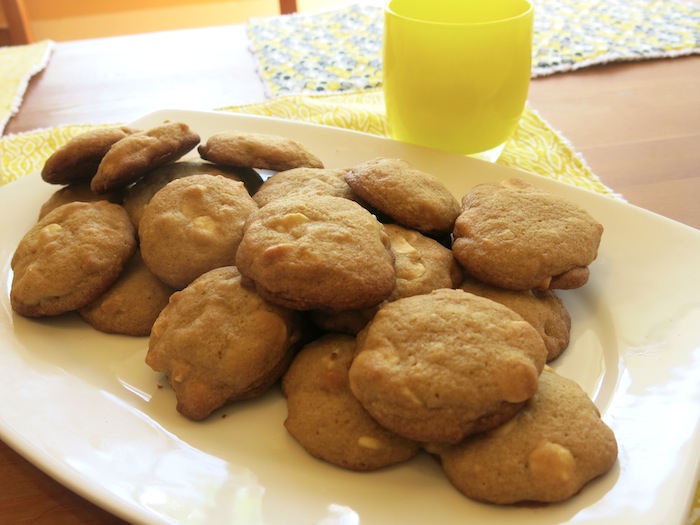
And Huzzah! They were a hit. The cookies were light, sweet, and delicious. The fact that the nuts were salted brought a nice touch of savory to the mix. (I love cookies that are a little bit salty.) These were just what he wanted and just the thing to brighten his day. I even had a few. I might reevaluate my thoughts on these particular cookies. But, these chocolate chip are still at the top of my list.
IMG_1248

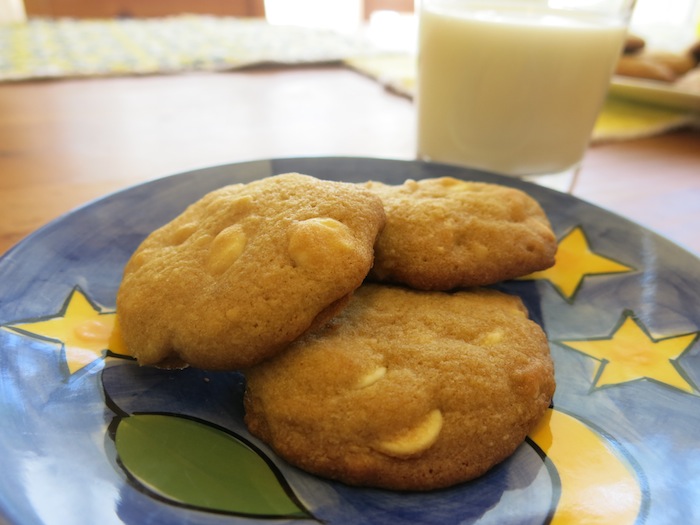
Enjoy with a glass of milk.

White Chocolate Chip Macadamia Nut Cookies

  • 1/2 cup coarsely chopped, salted macadamia nuts
Makes 24 cookies
Notes, If not using salted macadamia nuts, add 1/4 teaspoon salt to flour mixture before adding into creamy mixture.

Directions

  1. Preheat oven to 350 degrees F.
  2. In a large bowl, cream together the butter, brown sugar, and white sugar until smooth. Beat in the eggs, one at a time, then stir in the vanilla and almond extracts. Combine the flour and baking soda in a separate bowl. Then, gradually stir into the creamed mixture. Mix in the macadamia nuts and white chocolate. Drop dough by teaspoonfuls onto ungreased cookie sheets.
  3. Bake for 10 minutes in the preheated oven, or until golden brown.

IMG_1241

Enjoy!

June 17, 2013
by katie
1,239 Comments

Ginger Lime Simple Syrup

This year for Christmas, instead of giving out standard gifts, I decided to make baskets of home made goods and snacks. First of all, no one in my family really needs stuff. Often, they just ask for consumables anyways, so I thought that this year I would go all out and make wonderful collections of things to send out.

One of the things on my list was this Ginger Lime Simple Syrup from Epicurious.JessicaYagerPhotography-35-480x720

I’ve made a number of simple syrups in the last year. They are simple, delicious, and oh so pretty. I got rave reviews back from my friends and family on this one. Some people mixed it with tequila, some with gin and tonics, some simply with iced tea. I think this would be a great addition to any mixologist’s cabinet. It is incredibly simple, and if you can find some cute little containers, this makes a great gift.

But more importantly, it will help you make some delicious cocktails this summer! I know that I’ve become obsessed with gin as my summer liquor in the last few years. Some syrup, some gin, and some seltzer makes a pretty great summer refresher.

Ginger Lime Simple Syrup

Yield: Makes approximately 1 1/2 cups

  • 1 cup sugar
  • 1 cup water
  • 3-inch piece fresh ginger, peeled and cut into chunks
  • zest of 2 limes

Directions

Combine the sugar, water, ginger, and lime zest in a small saucepan over medium heat. Bring to a simmer, stirring occasionally until the sugar dissolves and the mixture is clear. Turn off the heat and allow the ginger and lime to steep in the syrup for 3 hours. Strain the syrup into an airtight glass jar. Store for up to 1 month in the refrigerator.

JessicaYagerPhotography-36-480x720Though it is hard to imagine it lasting a whole month. Drink it up and enjoy.

June 13, 2013
by katie
881 Comments

Franny and Zooey

It has been a long time since I posted a book review. Much like the crafting aspect of the site, it has been neglected since I’ve been so food focussed lately. But, I recently finished a book that I just loved and had to talk about. “Franny and Zooey” by J.D. Salinger.

51Se-s2ZglL._SL1044_This is the first book I’ve read by J.D. Salinger. I know, I must be the only person in the world who has never read “Catcher in the Rye”. But, I randomly added this book to my Amazon list last time I placed a big book order and it was the first one I picked up. I am very glad I made this random choice because I thought it was wonderful.

The book is largely dialogue. I would guess 75%. And it is witty, emotional, philosophical, and engaging. “Franny and Zooey” is actually a short story entitled “Franny” and a novella, “Zooey”. They are both members of the Glass family, a well to do New York family of misfits and geniuses. They are two out of seven grown children of the family, all of whom were at one time or another guests on a popular radio show of the time, “It’s A Wise Child”. They are well educated, in fact, perhaps overeducated, which leads to their bizarre outlooks on life and general unhappiness. Franny and Zooey are the youngest of the bunch and their elder siblings saw to their education. Zooey talks about how the older brothers made “freaks” out of them by choosing such strange things for them to study.

The short story “Franny” begins when Franny meets her boyfriend Lane at the train station for a weekend at his college. They have plans to have cocktails with people and go to a football game. They go for lunch and Lane prattles on about all the important things that are happening in his life. But, Franny finds herself in a destructive mood. She breaks apart all of his happiness and seems to be somewhere else. She finally changes the subject to a book that she has been reading, “The Way of a Pilgrim”. It is the tale of a simple pilgrim who goes on a search to find out what it means in the Bible when it says that one should pray incessantly. He travels the world looking for a teacher who can explain it and he discovers The Jesus Prayer, which is simply “Lord Jesus Christ, have mercy on me.” He is told that if you repeat it to yourself over and over, it may begin as just words, but it eventually becomes part of your heartbeat. It works its way inside a person and can show you God. It becomes clear that Franny is obsessed with this idea, talking about how there are parallels in various religions and cultures and how she finds it “fascinating”. However, we see her slowly breaking down over the course of her lunch, and she eventually passes out. When she awakes, we see her lips silently moving and realize she has begun her pilgrim path.

“Zooey” takes up with her brother, Zooey, in their parent’s apartment in New York. Franny is also there, essentially having a breakdown in the living room. This novella explores some of the background of the family and the interesting characters that it contains. Zooey talks to Franny and tries to alternately understand what she is doing, berate her for having such a shallow nervous breakdown, and try to talk her out of doing her Jesus Prayer. It is mostly dialogue, and fascinating dialogue at that.

I was left thinking that this book would be a phenomenal stage play. The characters were rich. The situation was bizarre and engaging. It was short and sweet. Or if not exactly sweet, a sentimental and simultaneously deep exploration of ego and the search for what our purpose is in this world.


June 10, 2013
by katie
1,139 Comments

Roasted Prosciutto Wrapped Figs

A while back, I had some ladies over for a fabulous luncheon. For an appetizer, I made Roasted Prosciutto Wrapped Figs. You can’t get much simpler or more elegant for an appetizer.

MG_6113-480x720

Seriously. This takes very little time to put together and looks fancy and decadent. Whoever you’re having over, they’ll be impressed.

When I was a kid, I loved Fig Newtons. They were one of my favorite cookies. I don’t remember eating an actual fig until I was an adult. But they are sweet and rich and  remind me of childhood.

With this recipe, the roasting brings out a caramelized sweetness to the figs, a deeper flavor. The prosciutto donates its saltiness to the cause and crisps up in a way to add delightful texture. And really, who doesn’t like bacon?

MG_6094-480x720I had initially planned to put a dollop of goat cheese inside each fig before wrapping them, but skipped this. One member of my party was dairy free. So instead, I had some soft goat cheese set aside. The dairy friendly among us just smeared a little on our plates.

MG_6123-479x720

It worked beautifully. The combination was so delicious! If you are making a cheese plate or bar as a starter for a party, these figs would be a fabulous thing to add. Fig season is on its way. Be sure not to miss out.

MG_6125-479x720
Roasted Prosciutto Wrapped Figs 

Cut figs in half. Cut strips of prosciutto in half lengthwise. Wrap figs in strips of prosciutto. Place on parchment lined baking sheets. 

MG_6030-479x720Roast at 400 degrees for 8-10 minutes, or until prosciutto crisps and the figs start to caramelize.

MG_6088-479x720Let cool slightly and serve.

MG_6115-480x720

Drink a glass of wine and enjoy.

Bon Appétit!

Photographs by Jessica Yager


June 6, 2013
by katie
1,160 Comments

Rosemary Orange Sugar Scrub

Ever since I relaunched the site, I’ve been super food focussed. So, I thought it was about time to throw in a fun, DIY craft project.

It is not at all surprising, but the inspiration for making my own bath scrubs came from Pinterest. I saw a picture, followed a link, and before I knew it, I had decided to make my own bath scrubs. I love having them around for my hands, feet, and just all over when I feel like treating myself. It leaves my skin feeling soft, smooth, and smelling wonderful.

This is a great and inexpensive way to get those feet ready for sandal season!

IMG_0824On top of all that, scrubs are insanely easy to make. The first time I did this, was at a craft night with some girlfriends. This was a really fun group activity. My friend and I kept making concoctions with more or less scent, rough to smooth sugar, etc. Then we would call in the others to test them out and get feedback. Needless to say, our hands were all very smooth by the end of the night and my kitchen smelled wonderful.

I love the smell of this particular concoction. It is very refreshing in the morning shower. I found my essential oils at a local organic grocery store, but if you can’t find them locally, they are on Amazon. There doesn’t seem to be much you can’t find on Amazon.

IMG_0823Scrubs like this are also a great handmade gift for friends. I handed out small mason jars of this one to all the girls at the craft night and I believe they were enjoyed. If you wanted to get super thoughtful, you could find out what your friend’s favorite scents are and make custom concoctions.

Try this out and adjust to your own likes. You can make a rougher scrub, a more or less scented one, or even try using salts instead of sugars!

Rosemary Orange Sugar Scrub

Ingredients:

1/2 cup fine sugar

3/4 cup raw sugar

1/2 cup grape seed oil

20 drops orange essential oil

10 drops rosemary oil

IMG_0821 Mix all together and enjoy. Essential oils may vary, so add slowly to find the right concentration.

IMG_0822 Then just relax and enjoy!

June 3, 2013
by katie
109 Comments

Farro

After a weekend of eating decadently, lately, my thoughts turn to farro. 4

Farro. What is farro anyways? Farro is a whole wheat grain, usually emmer wheat. It is boiled until plump, but still chewy, and I find it delicious.

6I bought a package years ago for a summer bbq. I had a vegetarian friend coming and wanted to make something nice for him. I found some recipe for a black bean and farro burger and if I recall, it was quite nice. In fact, I used leftovers of this salad to build out some veggie burgers this year for Memorial Day.

As it happens when you sometimes buy an unfamiliar ingredient for a specific recipe, the half empty bag sat on the shelf, forgotten for years. But, after the holidays this year, I was searching for something healthy and light to eat and I came across it in my pantry. The package I had previously purchased had expired, but I became so enchanted with the idea of a big bowl of grains, that I went to the store and got more. I have now finished my second package since that one.

7The first time that I served it to my boyfriend, I was talking about how healthy it was and how it was a whole grain. He had a bite and said, “It is kinda like weird rice.” Fine by me. If it helps, think of it as strange, chewy brown rice. It tastes a little nutty and is very satisfying. I’ve had it hot and had it cold straight out of the fridge and it is hard to say which is better.

2This is a great side dish. Serve roasted chicken over it, toss it in with an arugula salad, or just eat it as is for a simple and filling lunch or snack.

8Simple Farro Salad

1 cup farro

1 lemon, juiced

Drizzle of olive oil- Approximately 1 Tbs

1 tsp red wine vinegar

1 Tbs chopped parsley

Kosher salt and fresh pepper

Boil one cup farro in five cups water for five minutes, stirring frequently. Then cover and simmer for 50-60 minutes, or until farro is tender and starting to burst. (But, check directions on the package before using this method.)

Drain, transfer to a serving bowl, drizzle with lemon juice, olive oil and vinegar. Cover and let it sit for 15 minutes. This gives it time to soak up the flavors.

9Add the parsley and salt and pepper to taste. You will want a generous amount of the black pepper. Toss gently and serve at warm, cold, or room temperature.

10

Enjoy!

1


May 30, 2013
by katie
1,101 Comments

Union Square Bar Nuts

Warning: These nuts are highly addictive.

JessicaYagerPhotography-7-720x480
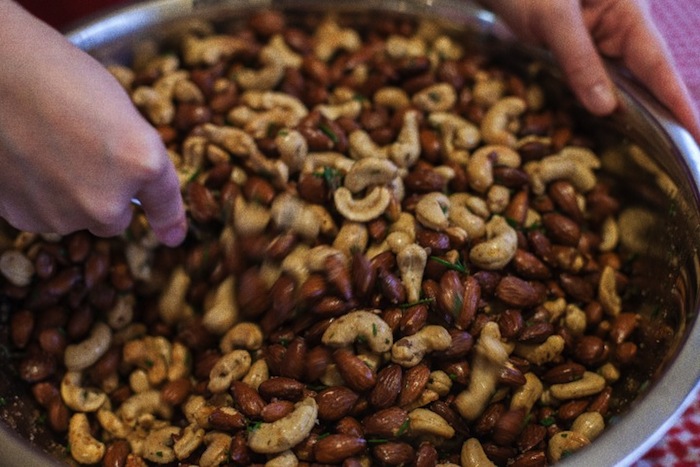
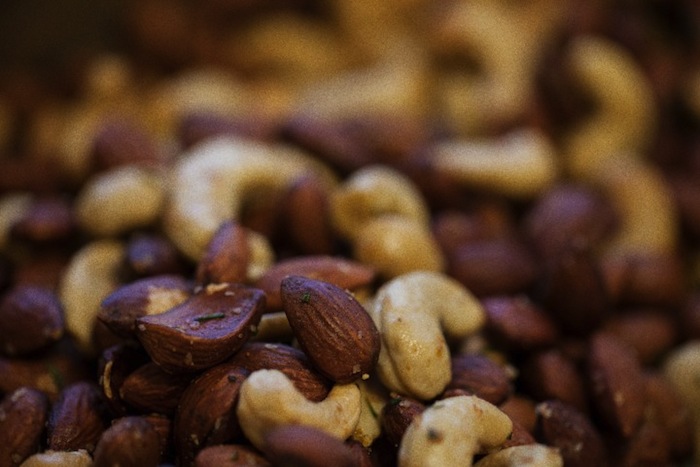
You will find yourself walking by them, grabbing handfuls, and eating them before you even realize it. Your friends will thank you for making them at first. And then they will start showing up at all hours asking for more, scratching at your door begging for more salty, buttery goodness.
JessicaYagerPhotography-5-720x480 To stop this insanity, I’m sharing the recipe with you now. Make your own nuts. You can do it. Feed the craving. JessicaYagerPhotography-6-720x720These nuts are one of my uncle’s favorite things in the world. My mother makes them for most parties and holidays. My uncle will walk in and happily station himself in front of the nut bowl until he has to be physically moved away from them. I made them and sent them to family for the Holidays this year and they were loved and devoured by all. These are a fabulous snack staple.
JessicaYagerPhotography-10-480x720-1
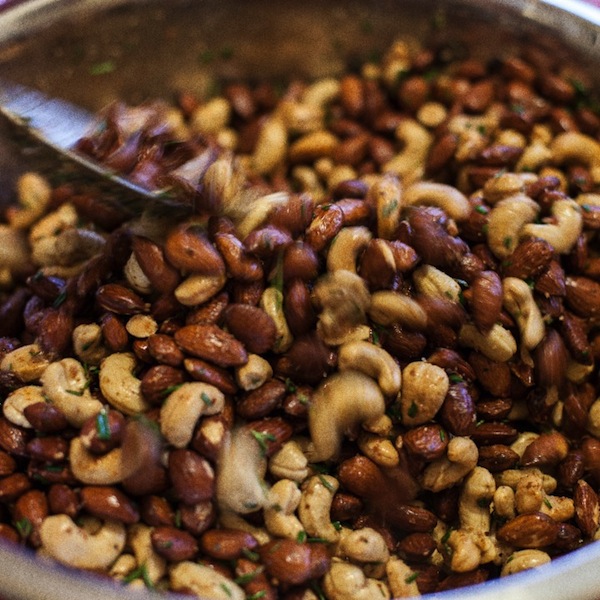
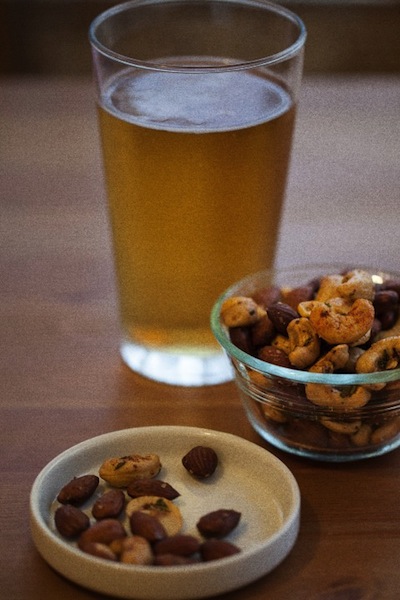
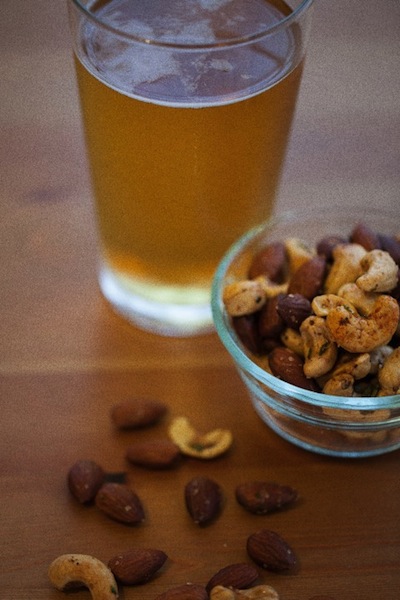
This is a great year round recipe. Enjoy them in the winter with a hearty dark beer. Enjoy them in the summer with a light beer, or a glass or wine, or a fancy cocktail, or just by the handful as you walk through the kitchen. JessicaYagerPhotography-8-480x720 
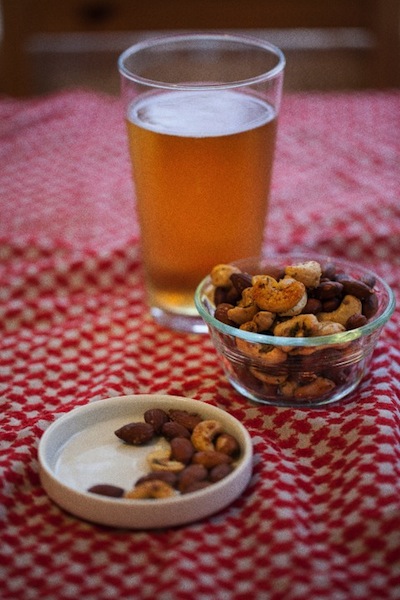
Any way you eat them will be just perfect. Make a big batch for a party or just for yourself. 
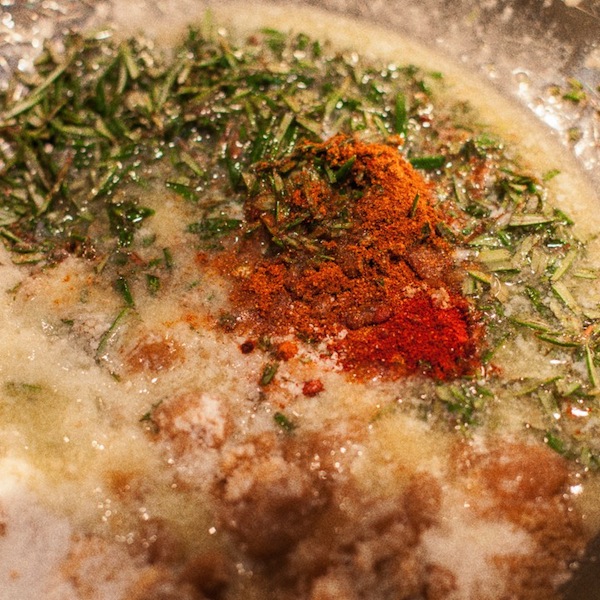
Union Square Bar Nuts

Ingredients
2 1/4 cups (18-ounces) assorted unsalted nuts, including a variety such as peeled peanuts, cashews, Brazil nuts, hazelnuts, walnuts, pecans and whole unpeeled almonds
2 tablespoons coarsely chopped fresh rosemary leaves
1/2 teaspoon cayenne pepper
2 teaspoons dark brown sugar
2 teaspoons Kosher salt
1 tablespoon unsalted butter, melted

Directions
Preheat the oven to 350 degrees F.

Toss the nuts in a large bowl to combine and spread them out on a baking sheet. Toast in the oven until light golden brown, about 10 minutes.

In a large bowl, combine the rosemary, cayenne, sugar, salt and melted butter. (Doesn’t that look delightful?)

JessicaYagerPhotography-3-720x720Thoroughly toss the toasted nuts in the spiced butter.

JessicaYagerPhotography-4-720x480And then eat them! Simple as that.

JessicaYagerPhotography-9-480x720

And once you start eating these, you will never want to stop. Invite a friend over, pour yourself a beer, and enjoy. That is, if you are willing to share.

Photographs by Jessica Yager

May 28, 2013
by katie
1,168 Comments

Asparagus and Goat Cheese Galette


What is a galette? According to wikipedia, Galette is a term used in French cuisine to designate various types of flat, round or freeform crusty cakes. In this recipe, a galette is much like a pizza, but imagine a pizza with pie crust instead of pizza dough. It is a freeform tart of sorts.

DSC01833

When I came across this recipe on Pinterest, the photo made me start to drool a little bit, so I delved deeper. What is in this recipe? Turns out? All things that I like.

What’s not to like? It is basically a buttery pie crust filled with various cheeses and topped with asparagus. And let me tell you, it works.

DSC01836

I made this for some girlfriends for lunch on a beautiful sunny spring day, though this would also be the perfect brunch item. These photos were taken outside under a tree at our lunch, hence the dappled lighting. It is perfect served alongside a simple arugula salad with a glass of wine.

I will be making this recipe again and making the crust over and over. The crust is super easy to put together and makes a great buttery, flaky crust. I generally cheat and buy puff pastry or frozen pie crust when I cook. I’m just not big into making my own crust, but this one is worth it and only takes a few minutes. You could put all kinds of things inside this crust. Cheese and ham, berries and yogurt, slices of apple and butter. The possibilities are near endless.


Asparagus and Goat Cheese Galette
Ingredients
Crust:
  • 1 1/4 cup all purpose flour
  • 1/4 teaspoon salt
  • 8 tablespoons frozen unsalted butter, cut into small pieces
  • 1/4 cup plain Greek yogurt
  • 1/4 cup ice cold water
  • 2 teaspoons lemon juice
Filling:
  • 1/2 cup goat cheese, softened
  • 1/2 cup freshly grated Parmesan
  • 1/4 cup grated mozzarella
  • 1 tablespoon plus 1 teaspoon olive oil
  • 1 garlic clove, minced
  • 1 pound asparagus, washed and trimmed
Glaze:
  • 1 egg yolk
  • 1 teaspoon water
Instructions
  1. To prepare crust, combine flour and salt in a mixer and stir. Add butter and mix until mixture resembles coarse meal. In a smaller bowl, whisk together yogurt, water, and lemon juice. Pour over flour mixture and mix until dough forms. Make dough into a ball with your hands. Wrap in plastic and store in freezer for 20 minutes.
  2. To prepare filling, whisk together olive oil and garlic in a small bowl. In a separate bowl, combine the three cheeses and stir in one teaspoon of olive oil mixture. Refrigerate until ready for use.
  3. To assemble galette, preheat oven to 400 degrees Fahrenheit. Line a baking sheet with parchment paper and set aside.
  4. On a well floured surface, roll the chilled dough into a 12-inch oval. Transfer dough to lined baking sheet. Leaving a 2-inch border, spread the cheese mixture evenly over dough. Arrange asparagus over the cheese then drizzle remaining olive oil mixture over the top. Fold over the edges of dough, pleating to make it fit.
  5. Whisk together egg yolk and water. Brush over the crust and bake for 30 minutes or until cheese is puffed, asparagus is tender, and crust is golden brown.

DSC01832


Slice it up, serve it warm, and enjoy!

May 23, 2013
by katie
1,146 Comments

Cream Cheese Pound Cake

Ah, Pound Cake.IMG_1257Hello my friend.
IMG_1262So simple. So delightful.

And so perfect for your upcoming Memorial Day weekend.

With all the fresh spring berries showing up in the market, much like the Strawberry Short Cakes from last week, Pound Cake serves as a fabulous medium from which to eat those berries.

IMG_1272I came across this recipe last weekend on Orangette, a blog from a fellow Seattlite whom I follow. It looked so good, I added it to my afternoon of baking. And I have to say, I’m just thrilled with how it turned out.

IMG_1281Can a cake be both dense and airy at the same time? Apparently it can. The cake has the denseness of a traditional pound cake, but somehow still tastes light on the tongue. It is sweet, though not overly so. And it has a nice tang from the cream cheese. This is an excellent vehicle for some fresh berries, peaches, or ice cream. And if you are looking for something simpler, toasted with some butter, it makes a pretty awesome breakfast.

IMG_1286The thing that I am possibly most excited about though is that this recipe makes two cakes, if done in regular loaf pans. According to Orangette, she froze one of the cakes and found that once defrosted, the frozen one was even better than the fresh one! So, I’m excited that I now have a spare pound cake in my freezer, waiting for one of those magical evenings when you find a bunch of people in your house that you didn’t expect and need to feed.

And by people, I mean friends in your house. I don’t think I’d feed pound cake to intruders or anything.

That’d be weird.

IMG_1269

Cream Cheese Pound Cake
Adapted from Southern Cakes, by Nancie McDermott, shared from Orangette.

Ingredients: 

3 cups all-purpose flour

1 teaspoon baking powder

¼ teaspoon fine salt

2 sticks unsalted butter, at room temperature

One 8-ounce package cream cheese, at room temperature

3 cups sugar

6 large eggs

1 teaspoon vanilla extract

Preheat the oven to 325°F. Grease and flour a 10-inch tube pan or two 9-by-5-inch loaf pans. (I also lined my pans with parchment, because it makes the cakes so easy to remove.)

In a medium bowl, whisk together the flour, baking powder, and salt.

In the bowl of a stand mixer fitted with the paddle attachment, combine the butter and cream cheese, and beat on medium speed until soft and fluffy. Add the sugar, and continue to beat for about 2 minutes more, stopping once to scrape down the sides. Add the eggs one at a time, beating well after each addition. Beat in the vanilla. Reduce the mixer speed to low, and add the flour mixture in three doses, beating only until the flour is absorbed and scraping down the sides of the bowl as needed. Scrape the batter into the prepared pan or pans.

Bake for about 1 hour and 15 minutes (for a tube pan) or 55 to 60 minutes (for loaf pans), or until the cake is golden brown, pulling away from the sides of the pan, and a cake tester inserted into the center comes out clean. Transfer the cake to a wire rack, and cool completely before loosening the sides with a thin knife and removing the cake from the pan.
IMG_1259

May 20, 2013
by katie
1,030 Comments

Bacon Ranch Potato Salad

I am on the search for the perfect potato salad. IMG_1274

Generally speaking, I’m not a huge potato salad fan. There are often mysterious crunchy bits and weird things hidden inside or it is bland or too sweet and needless to say, I have issues with it. The only potato salad that I’d ever made before that I really enjoyed was this one. It is a vinaigrette based salad that is really delicious.

So, why am I on this quest for the perfect potato salad if I have so many issues with the genre?

Because I was home in Arkansas recently and had some that absolutely BLEW MY MIND!

When I was home for my brother’s wedding last month, for one of the many meals we had as a family with the wedding party, my mother picked up some BBQ. This particular BBQ came from Whole Hog BBQ. I’ve mentioned them previously here. They are some of the best in the state. However, it wasn’t until this past visit that I tried their potato salad. It was so good! No weird crunchy bits. Lots of bacon. So good. In fact, after the wedding reception, when my parents and I made it back to the house long past midnight, exhausted, hungry, and a few drinks in, we sat around together and passed around that tub of potato salad until we polished it off. It was just about the best thing ever. That is family bonding my friends.

Understandably, I’ve been thinking about it since then. In fact, my boyfriend has since been back to AR and called me to tell me he was eating some more of it. I was very jealous. I wanted him to bring some back, but we decided it might not do so well after 6+ hours on a plane.

But, I’ve been inspired. I played around and I have come up with a seriously good potato salad recipe, inspired by the one at Whole Hog. It isn’t exactly the same, but it has been my favorite thing to sneak a bite out of when I peek in the fridge the last few days. It is darn near perfect and I will probably be making more for Memorial Day weekend this week. I recommend you do as well.

IMG_1278

Bacon Ranch Potato Salad

Ingredients:

1.5 lbs baby yellow potatoes

1/2 pound bacon

1/2 cup mayonnaise (Not Miracle Whip. I’ll come after you if you use Miracle Whip.)

1/2 cup Ranch Dressing

1 TB chopped Dill

1 TB Dijon mustard

1 tsp chopped chives

1/2 tsp salt

Black Pepper

1/4 tsp paprika (optional)

Directions:

Bring pot of salted water to boil. Add whole potatoes and cook until easily pierced by a fork.

While potatoes are cooking, fry bacon until crisp. When bacon is cool enough that you aren’t going to burn yourself, chop it up.

In a large bowl, mix mayo, ranch, dill, dijon, chives, and bacon.

When potatoes are cooked, drain them and run cool water over them until you can touch them without burning yourself. (It is very important to me that you don’t burn yourself.)

Here is the cutting of the potatoes that gave me the best consistency: Quarter potatoes (or cut into 6 pieces if they are larger) and put them in the large bowl with the sauce. For every four potatoes that you quarter, smash one and add to the sauce as well. This gives you a nice mix of bite size pieces and the yummy mashed parts between the pieces. Do this while the potatoes are still warm. It will make the sauce soak into the potatoes better, giving them more flavor.

Taste and then add plenty of black pepper and the salt if needed. Wait to add the salt until the end, because you will want to gauge the saltiness of the bacon you added. If you add the salt earlier, you could over do it. Add paprika.

Stick it in the fridge for a few hours for the salad to cool and the flavors to come together and then enjoy!

IMG_1279

If you are off to a BBQ this weekend, you will be the belle of the ball if you bring this dishy dish.